How to locate bottomfish structure with sonar
Oh, the age-old frustration of bottom fishing in Hawaii! You've got your gear, your bait, the perfect day out on the water, but if you're just dropping lines blindly, it can feel like you're playing a game of chance with a very low success rate. Hawaii's ocean floor is a labyrinth of lava rock, deep ledges, and hidden pinnacles, and finding those sweet spots where the opakapaka, onaga, and other delicious bottomfish hang out is absolutely critical. This guide is all about empowering you to take control, ditch the guesswork, and master your boat's sonar system to pinpoint fish-holding structure like a seasoned pro.
The Indispensable Role of Sonar in Hawaii Bottomfishing
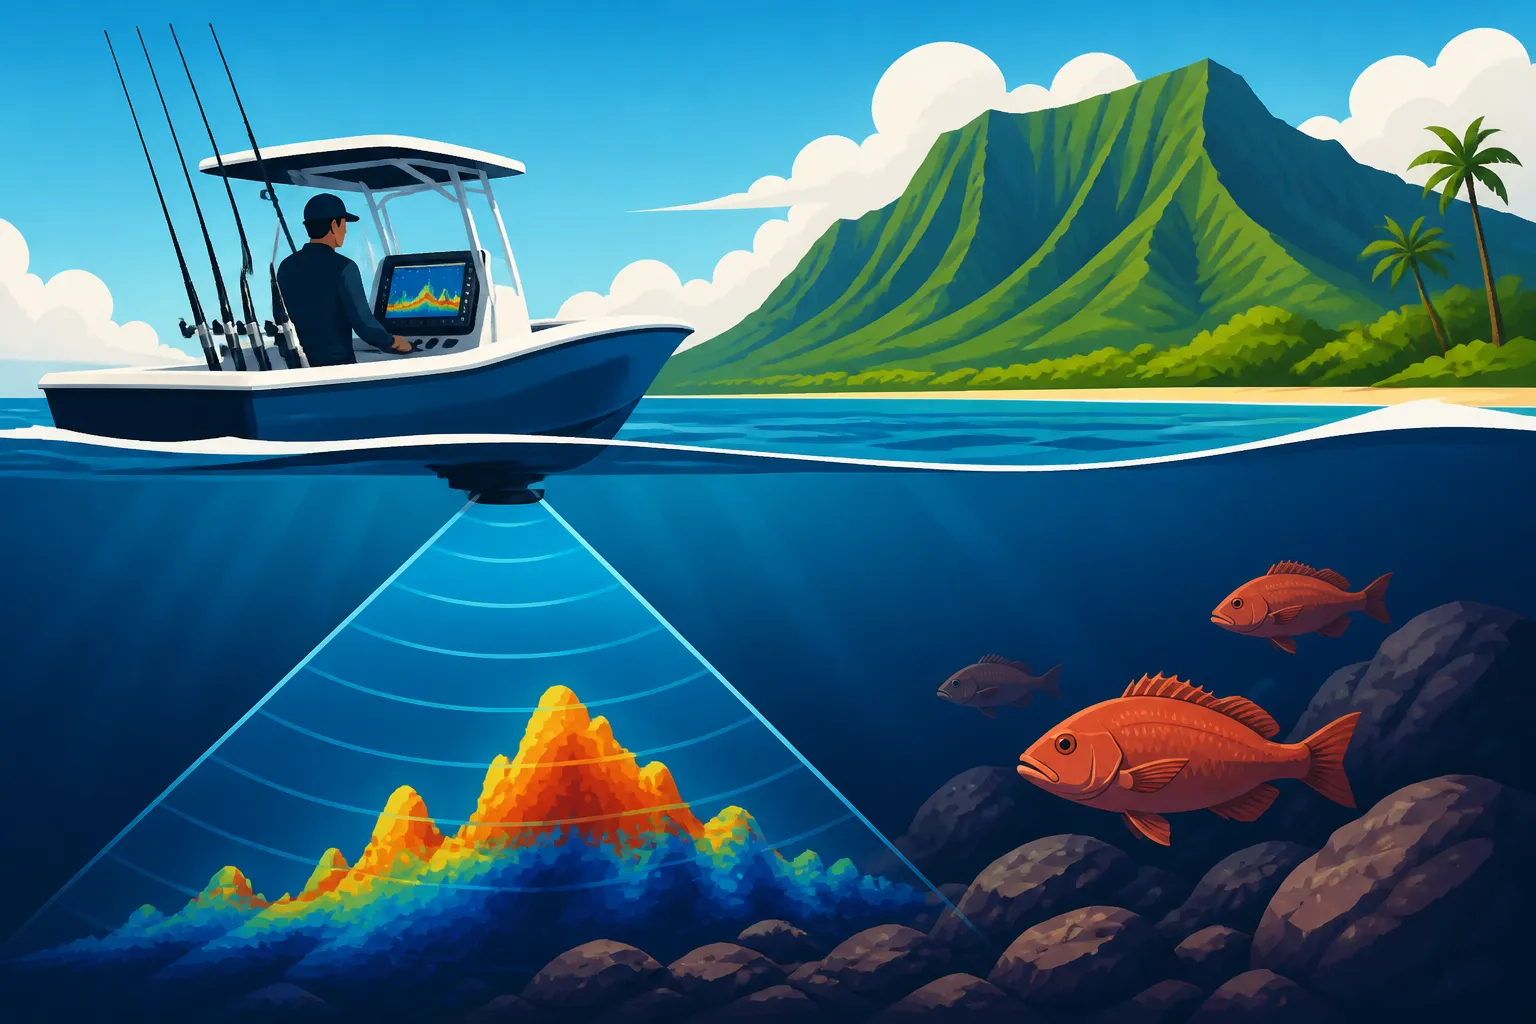
Let's be real, you wouldn't go hiking a dense forest without a map, right? So why would you try to navigate the complex underwater topography of Hawaii without the right tools? Sonar isn't just a fancy gadget; it's your eyes beneath the waves, an essential companion for anyone serious about catching bottomfish here.
Why Structure is King for Bottomfish in Hawaii
Think about it: fish need food, shelter, and places to ambush prey. In Hawaii, this almost always means structure. We're not talking about vast, flat sandy plains (though some species do frequent those); we're talking about the dramatic underwater landscapes carved by ancient lava flows and thriving coral growth. Ledges, rock piles, ledges that drop into abyssal depths, seamounts rising from the seafloor, and even hidden lava tubes – these are the condominiums and cafeterias for our prized bottomfish.
Imagine dropping your expensive setup into 600 feet of water, only to pull it up time and again with no bites. It's deflating, isn't it? That's because you're likely fishing barren ground. Opakapaka, for instance, love to congregate along steep drop-offs or near submerged pinnacles where currents bring them food. Onaga often lurk in the crevices and caves of deep-water lava formations. Without knowing precisely where these features are, you're essentially just hoping for a miracle. Sonar changes that completely. It allows you to visualize these underwater oases and focus your efforts where the fish are most likely to be. It turns fishing from a guessing game into a strategic hunt.
Beyond Just "Seeing Fish": Understanding the Ecosystem
While seeing a big red arch on your screen is exciting, sonar's utility goes far beyond just spotting individual fish. It helps you understand the entire underwater ecosystem. You're looking for patterns, transitions, and indicators that tell a story about where fish should be, even if you don't see them directly on the screen.
Consider baitfish. If your sonar shows dense clouds of smaller fish, especially near structure, that's a huge clue. Where there's bait, there are often predators. These schools might be tucked against a ledge, hiding from larger fish, which in turn might be lurking just outside the baitball's perimeter, waiting for an opportunity. Sonar also helps identify current breaks – areas where the current slows down due to an underwater obstacle. These quieter zones are often where bottomfish can rest out of the main flow while still having food delivered to them. You might also pick up subtle temperature changes on more advanced units, which can attract certain species. By mapping these elements – structure, bait, current breaks – you're building a comprehensive picture of a potentially productive fishing zone, not just a random spot. For an even deeper dive into these rich habitats, check out our guide on the Best Reef Fishing Spots in Hawaii.
Deciphering Your Sonar Unit: Types and Essential Features
Modern sonar units can look intimidating with all their buttons and screens, but breaking them down into their core functions makes them much easier to understand and utilize effectively. Knowing what each type of sonar does and how to adjust settings is your key to unlocking their full potential.
Types of Sonar for Hawaiian Waters
Not all sonar is created equal, especially when you're fishing the often very deep and rugged Hawaiian waters. Most good units today offer a combination of technologies.
- Traditional 2D Sonar (CHIRP vs. non-CHIRP): This is the classic fishfinder view, showing echoes as arches or lines. With 2D sonar, you're sending out sound waves and measuring the time it takes for them to return. A CHIRP (Compressed High-Intensity Radiated Pulse) sonar is a game-changer because instead of a single frequency pulse, it sends out a range of frequencies. This provides much clearer target separation, meaning you can distinguish individual fish even within a dense school, and offers better detail on the bottom. For deep bottom fishing in Hawaii, a powerful CHIRP transducer with low-frequency capabilities (like 50kHz or even 28kHz/40kHz for extreme depths) is incredibly valuable for penetrating hundreds, if not thousands, of feet of water. You'll see those fish arches much more crisply, helping you differentiate between a small reef fish and a trophy opakapaka.
- DownScan/ClearVü/Down Imaging: Different brands call it different things (Garmin has ClearVü, Lowrance has DownScan Imaging, Humminbird has Down Imaging), but the concept is the same. This technology uses high-frequency, narrow-beam sonar to create photo-like images of what's directly beneath your boat. It excels at showing the true shape and density of structure – distinguishing a sunken tree from a rock pile, or a school of bait from a cluster of reef fish. When you see a beautiful, detailed image of a ledge on your DownScan, it's far easier to visualize exactly where you want to drop your bait compared to a more abstract 2D representation. It’s like getting an X-ray of the seafloor.
- SideScan/SideVü/Side Imaging: This is perhaps the most revolutionary technology for structure fishing. Instead of just looking straight down, SideScan sends out beams to the sides of your boat, mapping a wide swath of the seafloor. This means you can cover huge areas quickly, scanning for structure you might otherwise pass directly over and miss with 2D or DownScan. Imagine motoring along and suddenly seeing a distinct rock pile or a long, winding ledge off to your port or starboard side that you didn't even know existed! This is especially effective for finding isolated pieces of structure, wrecks, or contours that might be missed on a direct overhead pass. Once you spot something interesting with SideScan, you can mark a waypoint, then turn and get a detailed DownScan or 2D view. Many anglers will spend considerable time "painting" an area with SideScan before making a single drop. You can find excellent multi-function units that combine all these technologies on platforms like Amazon, often bundled with versatile transducers.
A critical component to any sonar system is the transducer. This is the part that sends and receives the sound waves. For deep-water Hawaii bottomfishing, a powerful, high-quality transducer is non-negotiable. Thru-hull transducers (mounted through a hole in the boat's hull) generally provide the best performance in deep water as they have less interference, but transom-mount transducers can also be very effective if properly installed and if you don't need extreme depth capabilities.
Essential Settings and Their Impact
Learning your sonar unit means going beyond the default settings. Every fishing situation, depth, and bottom type might require different adjustments.
- Frequency: This is paramount for Hawaiian bottomfishing. High frequencies (e.g., 200kHz, 455kHz, 800kHz, 1.2MHz) offer incredible detail but don't penetrate very deep. They are perfect for shallow reef fishing. Low frequencies (e.g., 50kHz, 28kHz) sacrifice some detail but penetrate significantly deeper, making them ideal for the hundreds or even thousands of feet you might be targeting for deep bottomfish like Onaga. Many CHIRP units will sweep a range (e.g., Low CHIRP: 28-60 kHz, Medium CHIRP: 80-160 kHz, High CHIRP: 150-240 kHz). For serious deep dropping, you'll want to leverage those low-frequency CHIRP capabilities.
- Gain/Sensitivity: This controls how strong an echo your unit will display. Too low, and you'll miss faint echoes from fish or subtle structure. Too high, and your screen will be cluttered with noise, making it hard to interpret. The trick is to turn it up until you start seeing noise, then dial it back just a bit. This varies with depth and water conditions. You're looking for that sweet spot where fish arches are clear, and the bottom is well-defined, without too much "snow" on the screen.
- Range/Depth: Always ensure your depth range is set appropriately. If you're fishing in 500 feet, your range should be set to at least 600-700 feet to allow you to see fish suspended above the bottom and to prevent the unit from trying to read beyond its actual capability. Setting an auto-range can be convenient, but sometimes manual adjustment gives you a clearer view of the specific depth layer you're interested in.
- Scroll Speed: This dictates how quickly the sonar image moves across your screen. A faster scroll speed (relative to your boat's speed) can give you a more real-time view, which is useful when moving slowly over structure or fishing stationary. A slower speed can compress the image, making it harder to distinguish individual targets. Experiment with this based on your boat's speed.
- Noise Rejection/Filter: This setting helps filter out unwanted interference from your boat's engine, other electronics, or even nearby boats. Too much filtering can obscure legitimate fish signals, so use it judiciously. If you're experiencing a lot of clutter, try adjusting this. Sometimes, a simple adjustment can turn a fuzzy image into a crystal-clear display. Our guide on Best Techniques for Deep Drop Bottomfishing further discusses optimal setups.
Interpreting Sonar Readings to Pinpoint Fish-Holding Structure
Now that you understand the different types of sonar and how to adjust their settings, the real art begins: interpreting what you see on the screen. It’s like learning a new language, and with practice, you'll become fluent in reading the underwater landscape.
Identifying Different Types of Bottom Structure
The "bottom" in Hawaii is rarely flat. It's a mosaic of geological features, each with its own preferred inhabitants. Learning to distinguish these on your sonar is crucial.
- Hard vs. Soft Bottom: On 2D sonar, a hard bottom (like lava rock or coral reef) will typically show a thicker, more intense bottom return line, often with a secondary echo beneath it if your gain is high enough. A soft bottom (sand, mud) will appear as a thinner, less intense line. On DownScan, hard bottom will show up as bright, dense areas, while soft bottom will be darker and more uniform. Why does this matter? Many bottomfish prefer rocky, complex habitats where they can find shelter and food, while others might frequent sandy edges near the reef. Knowing your bottom type helps you target the right species.
- Ledges and Drop-offs: These are prime real estate for bottomfish. On 2D sonar, a ledge will appear as a sudden, sharp change in the bottom line. If you're moving over a drop-off, you'll see the bottom quickly disappear to a greater depth. On DownScan and especially SideScan, ledges are beautifully rendered as distinct vertical or angled breaks in the seafloor. Look for the "shadow" cast by the ledge on SideScan – this indicates its height and prominence. These are current breaks and ambush points that attract a wide variety of fish. Mark them as waypoints immediately! For guidance on what lurks there, our article on Opakapaka (Pink Snapper) Habits is a great read.
- Seamounts and Pinnacles: These are underwater mountains or towers that rise dramatically from the seafloor. On 2D sonar, they'll show as a rising bottom contour, often with fish arches clinging to their slopes. SideScan is excellent for finding these isolated features that might be off your direct path. Once you find one, a waypoint is essential. These submerged islands act as magnets for pelagic and bottom-dwelling species alike.
- Wrecks and Artificial Reefs: While less common than natural structure in Hawaii, wrecks and purposefully sunk structures (like certain FADs or old barges) are incredible fish attractors. On sonar, they'll appear as irregular, often jagged shapes rising from the bottom. SideScan will give you a detailed outline, revealing their full extent and height. Fish often school heavily around these man-made structures.
Spotting the Fish: Arches, Blobs, and Bait Schools
Interpreting fish signals takes practice, but there are some tell-tale signs to look for.
- Classic Fish Arches on 2D Sonar: The iconic "arch" is created when a fish passes through the sonar beam. A larger, thicker arch usually indicates a larger fish, while smaller arches are smaller fish. A complete arch means the fish swam through the center of your beam. If you see partial arches or streaks, the fish might have been on the edge of the beam. Pay attention to where these arches appear – are they right on the bottom? Suspended just above a ledge? Are there multiple arches indicating a school? The position relative to structure is key.
- Dense "Clouds" or "Balls" of Baitfish: On both 2D and DownScan, baitfish will often appear as amorphous blobs or dense clouds. These aren't individual fish arches, but rather so many tiny targets that they merge into a single mass. If you see these bait balls, especially near structure, get excited! Larger predators are almost certainly nearby. You might see bigger arches or blobs lurking on the edges of these bait clouds.
- Distinguishing Fish from Structure Clutter: This is where DownScan and SideScan truly shine. Sometimes on 2D sonar, a tight cluster of fish right on top of a rock pile can look like part of the structure. But switch to DownScan, and you might see clear individual fish separated from the rocky bottom. SideScan also helps differentiate because it shows structure in a more three-dimensional way, allowing you to see fish suspended above or off to the side of it, rather than just merging into the bottom return. When you're fishing deep for species like Onaga, those tight clusters near structure on your screen are what you're looking for.
Combining Views for a Complete Picture
The best sonar users don't rely on just one view. They actively switch between or use split-screen displays to get the most comprehensive understanding of the underwater environment.
Imagine you're cruising along at a decent clip, and your SideScan suddenly shows a promising ridge extending for hundreds of feet off to your starboard. You immediately mark a waypoint. Now, you turn your boat and slowly motor directly over that waypoint. As you approach, you switch to a split-screen view of 2D CHIRP and DownScan. The DownScan provides a photographic view, confirming the ridge's height and identifying some individual larger "spots" nestled in its crevices, while the 2D CHIRP simultaneously shows strong, distinct arches above and around the structure, indicating active fish. This combined approach gives you incredible confidence that you've found a prime bottomfish spot, and you can now precisely position your boat for your drop. This comprehensive visual is much more effective than relying on a single sonar view. Understanding Hawaii Fishing Seasons by Month can also help predict fish presence around structures.
Strategic Approaches for Sonar-Guided Bottomfishing in Hawaii
Finding the fish-holding structure with sonar is only half the battle. The other half is using that information strategically to maximize your chances of success. It's about developing a system that works for you and your boat in the unique conditions of Hawaiian waters.
Grid Searching and Pattern Recognition
Blindly driving around is rarely efficient. To truly leverage your sonar, especially SideScan, you need a systematic approach to covering an area.
- Developing a Search Pattern: When you enter a new area known for bottomfish, or even if you're exploring new ground, adopt a systematic search pattern. A common one is a "zig-zag" or "mowing the lawn" pattern, where you run parallel passes, each slightly overlapping the previous one, especially when using SideScan. Another approach is a "spiral" search, starting from a central point and gradually spiraling outwards. The goal is to "paint" the area with your sonar beams, revealing every nook and cranny of the bottom. This systematic approach ensures you don't miss any subtle changes in contour or isolated pinnacles that could be holding fish.
- "Painting" an Area with SideScan: This technique is paramount for uncovering hidden gems. With SideScan, you can often detect structure hundreds of feet to either side of your boat. By making slow, methodical passes, you're essentially creating a detailed map of the seafloor in real-time. Look for the shadows cast by prominent features – a long shadow indicates a tall structure. Pay attention to how current and depth affect what you see. The more you "paint," the more likely you are to uncover those secret fishing holes that casual anglers miss.
- Noting Repeatable Patterns of Structure and Fish Presence: Over time, you'll start to recognize patterns. Maybe opakapaka always seem to be on the downcurrent side of a specific type of ledge, or onaga prefer the deeper crevices on seamounts. When you find a productive spot, analyze its features on your sonar – the depth, the type of structure, the presence of bait. Then, try to find similar features in other areas. This kind of pattern recognition is a huge leap from simply finding a spot to understanding why that spot is good, allowing you to replicate your success elsewhere. It's like building your own mental fishing database. To understand the target species better, consult our Bottomfish Species of Hawaii guide.
Mark, Drift, and Refine
Finding the structure is step one; putting your bait on it is step two. This requires precision, especially in deeper water.
- Dropping Waypoints Precisely: This cannot be stressed enough. When your sonar lights up with fish on structure, immediately hit that waypoint button! And I mean immediately. Don't wait until you've passed over it. Modern GPS units are incredibly accurate, and a precise waypoint is your best friend for repeated success. You might even drop multiple waypoints along a long ledge or a school of fish. Think of these as breadcrumbs leading you back to the promised land.
- Understanding Drift Patterns: Hawaii's currents and winds can be fickle. Your boat will rarely stay exactly where you drop your bait, especially in deep water. Before you make your first drop, take a few minutes to observe your drift. Motor upcurrent/upwind of your waypoint, stop, and see which way and how fast you're moving. Your goal is to release your bait at just the right point so that it drifts down and lands directly on or very close to your marked structure. This often means releasing your line quite a distance upcurrent from the waypoint. This critical step prevents wasted drops and tangled lines.
- Making Small Adjustments Based on Successful Drifts: Did you get bites right as you passed over the waypoint? Did the fish come a little after? Note this. If your first drift was successful, try to replicate it, perhaps making a slight adjustment to where you start your next drift based on where the bites occurred. If you didn't get bites, adjust your starting point or approach angle slightly. Maybe try a faster or slower drift. The beauty of sonar and GPS is that you can continually refine your approach to pinpoint the exact fish zone. Some advanced boaters use GPS-controlled trolling motors with "virtual anchoring" features to hold their position precisely over structure, which is a massive advantage for deep dropping. Check out the Best Bottomfishing Charters in Hawaii for examples of how pros manage their drifts.
The Learning Curve: Practice Makes Perfect
Like any skill, mastering sonar takes time, patience, and a willingness to learn. Don't expect to be an expert after one trip.
- Spending Time Learning Your Specific Unit: Every sonar unit has its quirks. Read the manual! Seriously. Then, spend time on the water, even on non-fishing days, just playing with the settings. Drive over known features (like a channel marker or a buoy), and see how they appear on your screen. Experiment with gain, frequency, and scroll speed. The more familiar you are with your unit in various conditions, the more intuitive it will become. Don't be afraid to factory reset it and start fresh if you feel completely lost. Plenty of accessories and learning materials are available on Amazon to help you get the most out of your specific model.
- Cross-Referencing Sonar Data with Actual Catches: This is the ultimate feedback loop. When you get a bite or land a fish, immediately look at your sonar screen. What did you see? Was it a clear arch? A blob near structure? A school of bait? Take a mental snapshot (or better yet, a screenshot if your unit allows). This helps you build a library of "what fish look like" on your specific sonar, making future interpretation much easier. Conversely, if you spend a long time over what looks like good structure but get no bites, analyze why. Was the current too strong? Was there no bait? This critical analysis helps refine your understanding.
- Using Online Resources and Local Knowledge Alongside Sonar: Sonar is a powerful tool, but it's not the only one. Combine it with local knowledge from experienced fishermen, fishing reports, and even satellite imagery that can reveal shallow reef structures. Online forums and YouTube videos are excellent resources for learning advanced techniques and seeing how others interpret their sonar. No single tool gives you the whole picture, but by integrating sonar with other sources of information, you'll become a truly formidable bottom fisherman in Hawaii. For more regulatory insights that might influence your fishing spots, refer to Reading the Hawaii DLNR Fishing Regulations.
Disclaimer
This article is for general informational purposes only and does not constitute professional advice. Laws, prices and regulations vary by location and change over time. Consult a qualified professional for guidance on your specific situation.