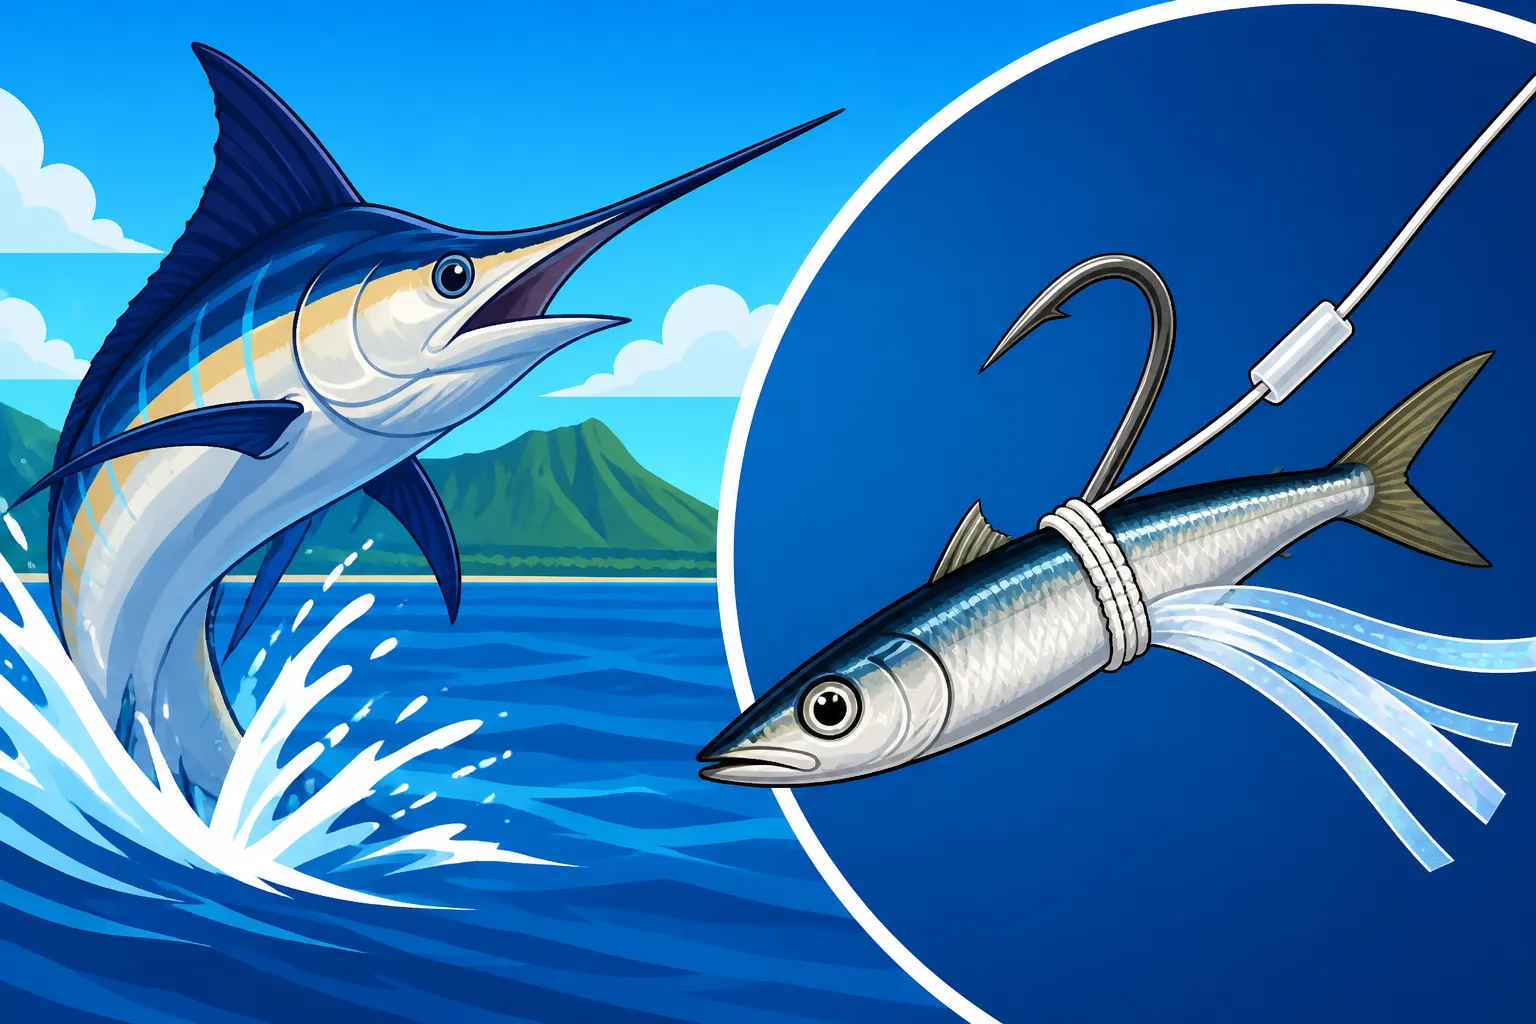
How to rig ballyhoo for marlin trolling
Chasing marlin in the vast, deep blue waters off Hawaii is an experience unlike any other, filled with anticipation and the raw power of nature. However, it can also be incredibly challenging, and many anglers face the frustration of baits that spin, wash out, or simply fail to attract the giants lurking beneath. Getting your bait presentation just right is absolutely crucial. This guide is dedicated to mastering the art of rigging ballyhoo for marlin trolling, a time-honored technique that dramatically increases your chances of hooking into that dream fish.
Why Ballyhoo are the Go-To for Marlin Trolling in Hawaii
When you're out on the Hawaiian waters, scanning the horizon for signs of pelagic activity, you want a bait that looks, feels, and swims like the real deal. Ballyhoo consistently deliver on this front, which is why they've earned their reputation as a premier bait for marlin and other big game fish. Their natural characteristics make them irresistible to powerful predators.
The Natural Appeal of Ballyhoo to Pelagic Predators
Imagine a marlin patrolling the open ocean, always on the hunt for its next meal. What does it look for? Something that moves erratically, flashes enticingly, and generally resembles the schooling baitfish it naturally preys upon. Ballyhoo fit this bill perfectly. Their slender, streamlined bodies, silver flanks, and distinctive long lower jaw create a profile that screams "easy meal" to hungry billfish, as well as tuna, mahi-mahi, and ono.
When properly rigged, a ballyhoo mimics a distressed or fleeing baitfish, making it an easy target. The natural oils and scent released from the bait also create an attractive trail in the water, drawing in curious predators from a distance. Unlike artificial lures, which rely solely on visual and vibrational cues, a ballyhoo offers a full sensory experience that can be the difference-maker on a slow bite. This realism is a huge advantage when you're targeting elusive and highly intelligent fish like marlin.
Versatility and Effectiveness in a Trolling Spread
One of the greatest strengths of ballyhoo as a trolling bait is their incredible versatility within a spread. Whether you're running a six-bait spread behind a large sportfisher or just a couple of lines from a smaller center console, rigged ballyhoo can be deployed effectively in almost any position. They can handle a range of trolling speeds, typically performing best between 6 and 9 knots, which is ideal for covering ground and searching for active fish.
When you're rigging ballyhoo, you can choose to present them "naked" – just the bait on its own – or dress them up with skirts, chuggers, or small lure heads. This flexibility allows you to customize your spread to match current conditions, target specific species, or simply add more flash and action. A well-rigged ballyhoo, swimming straight and true, looks incredibly lifelike and is significantly less prone to spinning or tumbling compared to other baits. This stability is crucial for long days of trolling, ensuring your bait remains effective and doesn't foul your lines. Many experienced captains will tell you that a well-presented ballyhoo is often the first bait to get hit in a diverse spread, highlighting its consistent appeal.
Essential Gear and Materials for Rigging Ballyhoo
Before you even think about putting a hook in a ballyhoo, you need to gather the right tools and materials. Having everything prepped and organized will not only make the rigging process smoother but also ensure your baits are robust enough to withstand the rigors of high-speed trolling and the vicious strike of a marlin.
The Right Ballyhoo: Fresh vs. Frozen and Handling Tips
The quality of your ballyhoo is paramount – a poorly conditioned bait will never swim as well as a pristine one, regardless of your rigging skills. While fresh ballyhoo are always the gold standard, often caught right before a trip or locally sourced, frozen ballyhoo are far more common for most anglers. If using frozen, the key is proper handling from the moment you acquire them.
Look for ballyhoo that have been blast-frozen and individually vacuum-sealed. This prevents freezer burn and keeps them from clumping together. When it's time to rig, thaw them slowly in a cooler with saltwater, never directly in freshwater or on the deck in the sun. Some anglers even prefer to thaw them in a brine solution of saltwater and baking soda, which can help firm up the flesh and brighten their appearance. Once thawed, keep them chilled and handle them gently. The goal is a ballyhoo that is firm, straight, and has clear, bright eyes – signs of a healthy bait that will swim naturally. Avoid any baits that are limp, discolored, or have cloudy eyes, as these are unlikely to perform well.
Hooks, Leaders, and Rigging Tools
Having the correct components is non-negotiable for effective ballyhoo rigging. Let's break down the essentials:
- Hooks: For marlin, you'll typically use strong, sharp J-hooks ranging from 8/0 to 10/0, depending on the size of your ballyhoo and the target species. Some anglers prefer circle hooks for better catch-and-release success, ensuring the hook sets in the corner of the fish's mouth. Ensure your hooks are corrosion-resistant and incredibly sharp right out of the package.
- Leaders: Your leader material needs to be robust. Monofilament or fluorocarbon leaders are common, with breaking strengths typically ranging from 200 to 400 pounds. Fluorocarbon offers more abrasion resistance and a lower visibility in the water, which can be an advantage in clear Hawaiian waters. The length of your leader will vary, but usually, a section between 6 and 10 feet is sufficient, allowing for good bait action and separating your hook from the main line. You can find quality leader material and hooks from reputable online vendors like Amazon, or at local tackle shops.
- Rigging Wire: Fine, soft rigging wire (usually 25 to 50 lb test, often called "copper wire" or "monel wire") is essential for securing the ballyhoo's mouth and gill plates. This wire needs to be pliable enough to wrap tightly but strong enough to hold up to trolling speeds and strikes.
- Rigging Needle: A long, slender rigging needle with an eye on one end is critical for passing the leader through the ballyhoo. There are various styles, but a basic straight or slightly curved needle will work for most methods.
- Bait Cotton/Floss: Unwaxed dental floss or specialized bait cotton is used to secure the ballyhoo to the leader or chin weight, preventing it from sliding up the line during trolling or a strike.
- Scissors/Wire Cutters: Sharp scissors for cutting leader and specific wire cutters for the rigging wire are invaluable.
Here’s a quick overview of what you'll need:
| Item | Purpose | Key Considerations |
|---|---|---|
| Ballyhoo | Primary bait for marlin | Fresh or properly thawed frozen; firm, straight, clear eyes |
| Hooks | To secure the fish | 8/0 – 10/0 J-hooks or circle hooks; sharp, strong, corrosion-resistant |
| Leader Material | Connects hook to main line | 200-400 lb monofilament or fluorocarbon; abrasion-resistant |
| Rigging Wire | Secures mouth/gills, attaches hook | 25-50 lb copper or monel wire; pliable yet strong |
| Rigging Needle | Passes leader through bait | Long, slender, with eye; straight or slightly curved |
| Bait Cotton/Floss | Secures bait to leader/chin weight | Unwaxed dental floss or specialized bait cotton |
| Scissors/Cutters | Cutting line and wire | Sharp, dedicated tools for efficiency |
| Chin Weights (Opt.) | Adds stability, helps bait swim deeper/straighter | Various sizes; ensures correct swim action |
| Lure Skirts (Opt.) | Adds flash, protects bait, attracts fish | Various colors and sizes to match conditions |
Step-by-Step Guide to Rigging Ballyhoo for Trolling
Now that you have your perfectly conditioned ballyhoo and all the necessary rigging materials, it’s time to get down to business. There are several ways to rig a ballyhoo, but we'll focus on two popular and effective methods: the classic skirted ballyhoo pin rig and the more durable wire-through-gills rig. Both aim for the same outcome: a bait that swims flawlessly.
Preparing the Ballyhoo (Breaking the Backbone)
Before any rigging begins, your ballyhoo needs to be flexible enough to swim naturally and straight without kinking. This crucial first step involves limbering up the bait:
- Work the Body: Take the thawed ballyhoo and gently hold its head in one hand and its tail in the other. Slowly and carefully bend the bait back and forth along its spine. You're not trying to break it in half, but rather to "break the backbone" or limber it up. You'll feel a slight popping or crunching sensation as the vertebral column becomes more flexible. This ensures the bait doesn't stiffen and spin in the water.
- Soften the Head and Jaws: Pay special attention to the head and jaw area. Gently squeeze and massage the area around the eyes and jaw to make it pliable. This helps ensure the mouth closes cleanly and the rigging wire can pass through easily. You want the ballyhoo to be able to open and close its mouth slightly, but not wide open, which can create drag.
- Ensure Straightness: Lay the ballyhoo on a flat surface and ensure it's perfectly straight. A curved ballyhoo will inevitably spin when trolled, making it unattractive to fish and a nuisance to your lines. If it's curved, gently manipulate it until it lies straight. This initial preparation is foundational; a well-limbered and straight ballyhoo is already halfway to being a perfectly presented bait.
The Classic Skirted Ballyhoo Rig (Pin Rig Method)
This is perhaps the most common and versatile way to rig ballyhoo for marlin, often used with a small skirt or lure head to add flash and protect the bait. This technique is designed for a natural, lively swim.
- Prepare the Leader and Hook: Start with your chosen leader material (e.g., 200 lb fluorocarbon) and crimp or tie your hook (e.g., 9/0 J-hook) to one end. About 6-8 inches up from the hook, create a small loop or haywire twist that will form a "pin." This pin will be inserted into the ballyhoo's head.
- Insert the Pin: Take your ballyhoo and, using the rigging needle, carefully insert it through the bottom jaw, up through the top of the head, and out between the eyes. Thread the leader with the "pin" through the eye of the needle and pull the leader through the ballyhoo's head until the pin is fully recessed inside the ballyhoo's head, emerging from the top of its head, just in front of the dorsal fin. The hook should now be positioned with the bend just past the ballyhoo's vent.
- Secure the Mouth: Take a length of rigging wire. Pass one end through the ballyhoo's eye socket from one side to the other. Then, bring both ends of the wire around the top and bottom jaw, crossing them, and wrapping them tightly to secure the ballyhoo's mouth shut and hold it to the leader. Trim any excess wire, ensuring there are no sharp ends. This keeps the bait streamlined and prevents water from entering the mouth and blowing the bait out.
- Add a Skirt (Optional but Recommended): Slide your chosen lure skirt (a small bullet head or chugger lure works great) down the leader and over the ballyhoo's head. The skirt helps protect the ballyhoo, adds color and flash, and often provides a bit of turbulence that attracts fish. For more tips on lure selection, you might want to check out our guide on Best Lures for Marlin Trolling off Kona.
- Test the Swim: Before deploying, always test your rigged ballyhoo boat-side. Drop it in the water next to the boat and observe its action. It should swim straight, with a subtle head shake, mimicking a live baitfish. If it spins, it's not rigged correctly and needs adjustment. This could mean reshaping the ballyhoo, adjusting the pin, or re-wiring the mouth.
The Wire-Through-Gills Rig (for Durability)
This method is known for its durability and is often favored when trolling at higher speeds or in rougher conditions, as it provides a very secure attachment. It's also excellent if you're looking for a bait that can withstand multiple strikes from fish that miss the hook.
- Prepare the Hook and Leader: As with the pin rig, start by tying or crimping your hook to the leader. For this method, you can have the leader run directly to the hook, with no need for a "pin" loop. You might consider a chin weight for added stability, which would be crimped directly onto the leader a few inches above the hook.
- Thread the Wire through Gills: Take a longer piece of rigging wire. Gently open the ballyhoo's mouth and thread the wire through one gill plate, out the mouth, and back in through the other side of the mouth, exiting the opposite gill plate. You should have an even length of wire protruding from each gill.
- Secure the Hook: Insert the hook into the ballyhoo so the point is exposed cleanly near the belly and the bend is just past the vent.
- Secure the Ballyhoo to the Leader: Bring the leader up through the mouth of the ballyhoo. Take one end of the rigging wire (from the gill plate) and wrap it tightly around the ballyhoo's upper jaw and the leader, securing the bait to the leader just beneath the chin. Repeat with the other side, wrapping the other end of the wire around the lower jaw and the leader. The goal is to bind the ballyhoo's head securely to the leader, ensuring it remains straight.
- Add Bait Cotton/Floss: For extra security, wrap bait cotton or unwaxed dental floss tightly around the ballyhoo's head, over the wired jaws, and around the leader several times. This further prevents the bait from sliding or tearing, especially if you're pulling it through a chugger lure head. Finish with a few half-hitches and snip the excess.
- Add Skirt/Lure Head: Like the pin rig, you can slide a skirt or a small lure head over the ballyhoo to enhance its appeal and offer additional protection. Ensure the skirt sits snugly over the ballyhoo's head. Remember, a natural presentation is key to attracting species like marlin, as detailed in our comprehensive guide on How to Catch Marlin off the Kona Coast.
Trolling Techniques and Presentation with Rigged Ballyhoo
Rigging ballyhoo perfectly is only half the battle. The other half lies in how you present these baits in your trolling spread. Getting the speed, position, and overall presentation right will maximize your chances of enticing those powerful pelagic fish that roam Hawaii's waters. It's about creating an illusion of a thriving bait school, and your rigged ballyhoo are the stars of that show.
Optimizing Your Trolling Speed and Spread
The right speed and spread can make all the difference when targeting marlin and other fast-moving pelagics. It's a dynamic balance that requires constant attention.
- Trolling Speed: For rigged ballyhoo, a common sweet spot for trolling speed is typically between 6 and 9 knots. This range allows the ballyhoo to swim naturally, with a subtle, enticing "wiggle" or "swim" action that mimics a live baitfish. Too slow, and the bait might look dead or lifeless; too fast, and it might spin or skip unnaturally, scaring off fish. Factors like current, sea state, and the specific action of your lure heads will influence the exact optimal speed on any given day. You'll need to watch your baits constantly to ensure they are swimming correctly. When you get it right, the bait looks alive, effortlessly gliding through the water.
- The Trolling Spread: A well-designed trolling spread is like a carefully orchestrated ballet of baits and lures. The goal is to cover different depths and present your rigged ballyhoo at various distances from the boat, simulating a school of baitfish.
- Short Corner: Often closest to the boat, usually a lure or a heavily weighted ballyhoo that can handle prop wash.
- Long Corner: Set a bit further back, often another lure or skirted ballyhoo that runs cleanly.
- Flat Lines: Run straight off the sides of the boat, just outside the prop wash. These are prime spots for perfectly swimming rigged ballyhoo, often "naked" or with a light skirt.
- Shotgun (Center Rigger): The longest line, run far back in the spread, often with a smaller, unweighted ballyhoo or a light lure. This bait looks like a straggler, an easy meal.
The specific positions and lengths can be adjusted, but the idea is to create a staggered, natural-looking pattern that covers a wide swathe of water. You can learn more about general offshore strategies in our guide to Trolling Techniques for Hawaii Pelagics.
Adding Skirts, Chuggers, and Dredges for Added Attraction
While a perfectly rigged ballyhoo is effective on its own, adding attractors can significantly increase its appeal and help you stand out in the vast ocean.
- Lure Skirts: Sliding a small lure skirt over your rigged ballyhoo is a popular technique. These skirts come in various shapes, sizes, and colors (e.g., green and yellow, black and purple, pink and blue). They add flash, vibration, and a larger profile, making the ballyhoo more noticeable. The skirt also helps protect the bait from small nibblers and prolongs its life. Choosing the right color often depends on the water clarity, light conditions, and what baitfish are prevalent. For instance, a small Kona-style bullet head or a chugger head run in front of your ballyhoo can create a smoke trail and splash, further mimicking a panicked baitfish.
- Chuggers and Jet Heads: These are heavier lure heads that create significant commotion in the water—splashes, bubbles, and a unique swimming action. They are typically paired with a ballyhoo or sometimes run on their own. The combination of a chugging lure and a natural ballyhoo is often irresistible to marlin. They add a lot of excitement to the spread and are often placed in the short or long corner positions to take advantage of the boat's wash.
- Dredges and Teasers: While not directly attached to your hook, dredges and teasers are vital components of a successful marlin spread. Dredges consist of multiple artificial or natural baits rigged on a frame to simulate a large school of baitfish. They are trolled subsurface, creating a massive visual attraction that draws fish closer to your spread, where they then notice your hooked ballyhoo. Teasers are similar, but usually single, larger lures trolled without hooks, solely designed to excite and bring billfish into striking range. For deeper insights into these methods, consider researching specific Marlin Fishing off the Kona Coast strategies.
Troubleshooting Common Ballyhoo Rigging Issues
Even experienced anglers occasionally encounter problems with their rigged ballyhoo. Knowing how to diagnose and fix these issues quickly can save your day on the water.
- The Spinning Bait: This is the most common and frustrating problem. A ballyhoo that spins will not get bites and will likely tangle your lines.
- Causes: The bait might not have been limbered enough, causing it to be stiff. It could be bent or curved, or the rigging pin/wire might not be perfectly straight. Too much force applied during the rigging process can also distort the bait.
- Fixes: If your ballyhoo is spinning, retrieve it immediately. Re-limber the bait, paying close attention to its backbone and head. Ensure the rigging pin or wire is perfectly aligned with the bait's body. Sometimes, a tiny lead weight inserted into the ballyhoo's chin (a "chin weight") can help stabilize its swim. You might also need to adjust your trolling speed; sometimes a slight increase or decrease can rectify a minor spin.
- Washout and Deterioration: Ballyhoo, being natural bait, won't last forever. However, you want to maximize their time in the water.
- Causes: High trolling speeds, rough seas, or small "pecking" fish can cause the ballyhoo to deteriorate rapidly. Improper rigging (e.g., loose wire, insufficient floss) can also contribute.
- Fixes: Ensure your rigging wire and bait cotton are applied tightly and securely. Using a lure skirt over the ballyhoo's head provides a layer of protection from water pressure and minor bites. Consider using the wire-through-gills method for extra durability in rough conditions. Regularly check your baits for signs of wear and tear, and replace them promptly when they start to look less than perfect. A fresh, properly rigged bait is always more appealing.
- Maintaining Natural Swim Action: The goal is always a natural, lifelike presentation.
- Causes: Incorrect hook placement, too much rigging wire, or a chin weight that is too heavy can all inhibit natural movement.
- Fixes: Ensure your hook is positioned so it doesn't impede the ballyhoo's tail or body movement. The rigging wire should be just tight enough to hold the mouth closed and secure the bait, without squishing or deforming the ballyhoo's head. If using a chin weight, start with a lighter one and only increase if necessary to achieve the desired swim. The best way to learn is to practice and observe the baits in the water, boat-side, before sending them out into the spread. This practice will serve you well when you're out targeting species like ahi as well; check out our guide on Best trolling speed for ahi in Hawaii for related insights.
Rigging ballyhoo is an acquired skill, one that gets easier and more intuitive with practice. Don't get discouraged if your first few baits don't swim perfectly. Take your time, focus on the details, and soon you'll be rigging baits like a pro, ready to tackle the majestic marlin that roam the Hawaiian seas. The rewards of a perfectly presented bait, especially during the Best Time of Year to Fish in Hawaii, are well worth the effort.
Disclaimer
This article is for general informational purposes only and does not constitute professional advice. Laws, prices and regulations vary by location and change over time. Consult a qualified professional for guidance on your specific situation.