Spearfishing Techniques for Hawaii Reefs
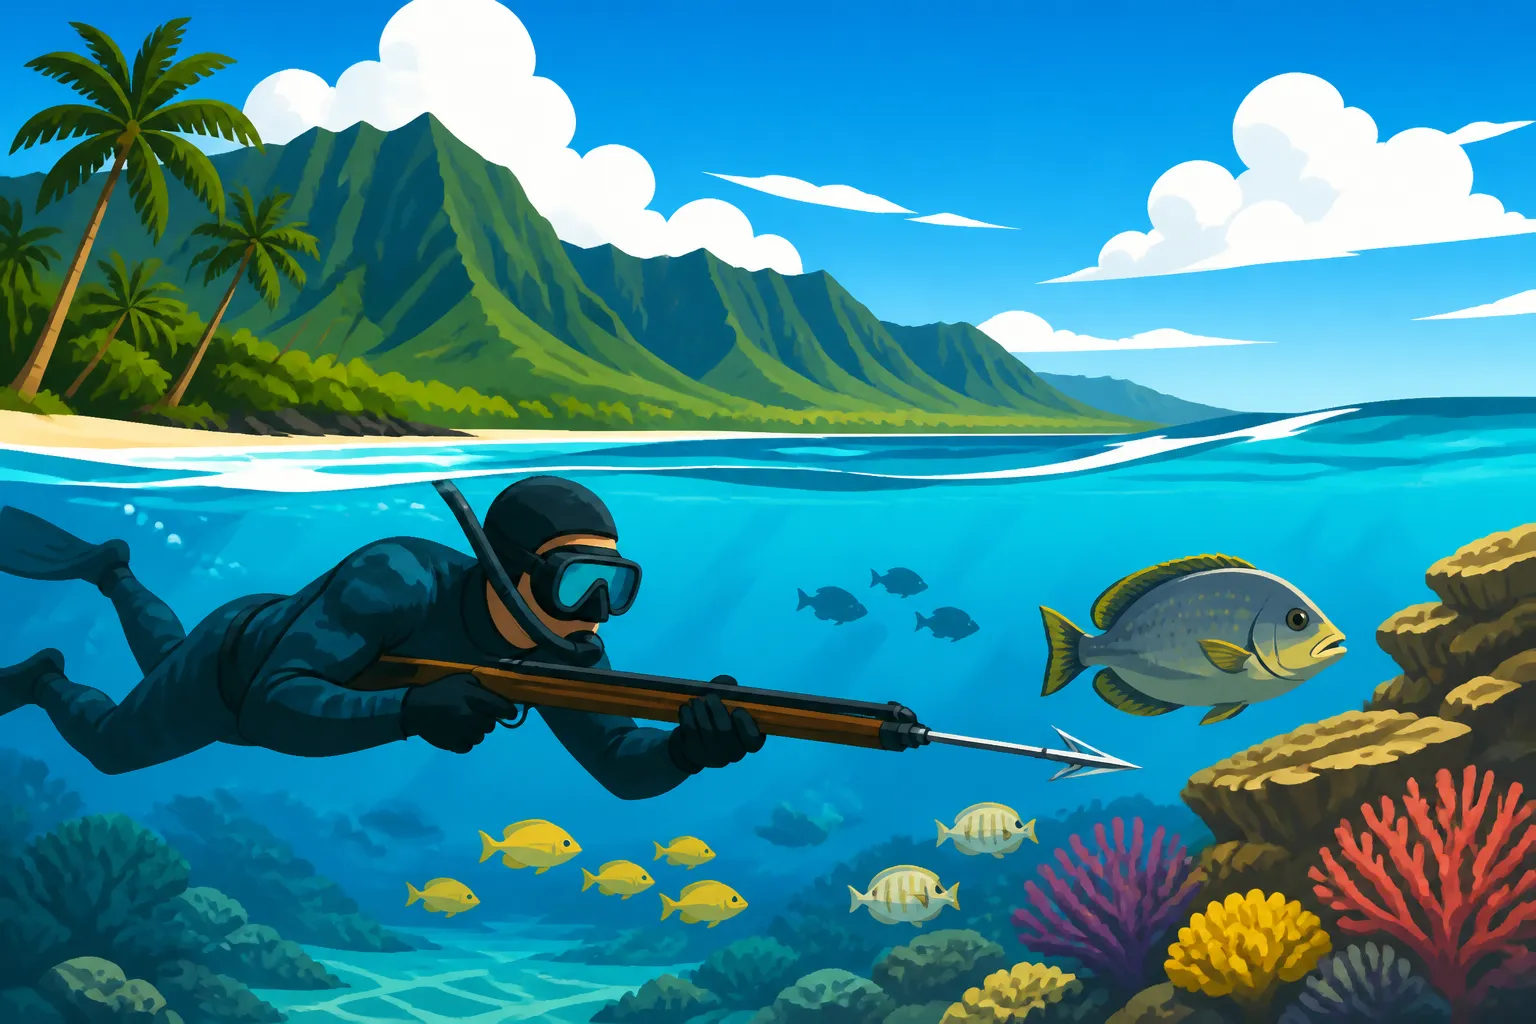
You slip off the lava ledge, clear your mask, and the reef opens up below you: kala cruising, a cluster of manini, a fat uhu grinding on coral. Then reality hits. Your breath runs short, the fish keep drifting just out of range, and you surface empty-handed and a little rattled. This guide breaks down the techniques, safety habits and rules that turn frustrating reef dives into steady, responsible success.
Why Spearfishing Hawaii’s Reefs Is Its Own Discipline
Spearfishing in Hawaii is not just “freediving with a spear.” The islands have steep volcanic reefs, surge that can roll you across coral, crystal clear water that makes fish wary, and a strong local culture of subsistence diving with its own unwritten rules. Techniques that work in a calm Caribbean lagoon or a California kelp bed often need adjustments here.
A Living Tradition, Not Just a Sport
For many families in Hawaii, diving for fish is how dinner gets on the table. Generations of divers have worked the same stretches of reef with three-prong pole spears and simple fins, learning the habits of each species and the moods of each bay. That history matters. It shapes the etiquette you will be expected to follow, it explains why some divers are protective of their spots, and it is why taking only what you need is more than a slogan here.
If you arrive with that respect, you will find the local diving community generous with advice. If you arrive treating the reef as a shooting gallery, you will learn quickly that you are not welcome.
What Makes Hawaiian Reefs Different
Hawaii’s reefs are young, volcanic and exposed. Instead of wide, flat lagoons protected by barrier reefs, most of the coast has fringing reefs that drop from shallow ledges to deeper boulder fields and sand channels within a short swim. Lava tubes, arches and overhangs are common, and they are exactly where many target fish like to hide.
The other big factor is energy. Open ocean swells travel thousands of miles and hit Hawaii’s shores with very little to slow them down. Even on a moderately calm day, surge can push you several feet back and forth near the bottom. North shores tend to get big surf in winter; south shores get more swell in summer. Learning to read that rhythm is as important as learning to shoot.
The Clear Water Problem
Hawaii’s water is often startlingly clear, with visibility that can stretch to many tens of feet. That is wonderful for sightseeing, but it means fish can see you coming from a long way off. Many visiting divers are surprised by how skittish reef fish are, especially in heavily dived areas. Stealth, patience and approach techniques matter more here than raw shooting skill. Much of what follows is about getting closer without spooking fish.
Legal Basics Every Spearfisher Must Know
Before you buy a spear or plan a dive, understand the rules. Hawaii’s spearfishing laws combine statewide regulations, regional rules and site-specific protections, and they change over time.
Licenses, Breath-Hold Rules and SCUBA
Recreational marine fishing in Hawaii, including spearfishing, has historically required no general license for residents, but visitor licensing has been under change. Our Do You Need a License to Spearfish in Hawaii? article walks through who needs what. Always verify with the Division of Aquatic Resources before your trip.
Spearfishing while using SCUBA is restricted in Hawaii. In West Hawaii on the Big Island, it has been banned for years, and broader restrictions have been debated and adopted in other forms. The safest approach is simple: if you plan to spearfish, do it on a breath hold. Hawaii SCUBA Spearfishing Ban explains the history and the current scope, and Hawaii breath-hold spearfishing rules covers what is allowed when you are freediving.
Protected Areas Where Spearing Is Prohibited
Hawaii has Marine Life Conservation Districts, Fishery Management Areas and other protected zones where spearfishing is restricted or banned outright. Hanauma Bay on Oahu, Molokini Shoal on Maui and Kealakekua Bay on the Big Island are among the best-known examples, and many others exist on every island. Signage is not always obvious, and some zones only cover part of a bay.
Before diving a new spot, check whether it falls within a protected area. Our Hawaii Marine Life Conservation Districts, Explained guide outlines how these districts work and why they matter for the health of the reefs you are diving.
Species Rules, Size Limits and Closed Seasons
Many popular reef targets have minimum sizes, bag limits or closed seasons. Uhu (parrotfish) are a prime example, with rules on size and number, and stricter protections for some species and the large terminal-phase males. Moi have a summer closed season. Spiny lobsters have a closed season and size limit, and they may not be speared. Tako (octopus) have a minimum weight. Some areas have extra rules on top of the statewide ones.
| Target | Common Rule Type | What to Check Before Diving |
|---|---|---|
| Uhu | Size and bag limits, species-specific protections | Hawaii Uhu (Parrotfish) Size and Bag Limits |
| Moi | Summer closed season, minimum size | Closed months and size |
| Spiny lobster | Closed season, size limit, no spearing | Season dates and legal methods |
| Tako | Minimum weight | Weight rule and method |
| Kumu, weke, manini | Minimum sizes | Current size table |
| Taape, roi | Introduced species, generally encouraged to remove | Local guidance and ciguatera risk |
These details change, so check the current regulations every season. When in doubt, let the fish go. A missed meal is better than a fine or a harmed population.
Essential Gear for Hawaii Reef Spearfishing
The best spearfishing setup in Hawaii is usually simpler than people expect. Many local divers still rely on a three-prong pole spear, a good mask and long fins, and they consistently outfish visitors with expensive guns.
Pole Spears, Slings and Spearguns
The three-prong pole spear is the classic Hawaii reef tool. It is a long shaft, usually fiberglass, carbon or aluminum, with a rubber sling on the back and a three-pronged tip on the front. You load it by pulling the sling up the shaft and gripping it, then release it toward the fish. It is cheap, light, quick to reload and well suited to shooting fish at close range in holes and cracks.
The Hawaiian sling, despite its name, is a different tool: a separate shaft fired from a handheld tube with a band, a bit like a slingshot. It is less common in modern Hawaii diving than the pole spear but still used by some.
Band-powered spearguns offer more range and power, which helps with larger and more wary fish, but they are heavier, slower to reload and more dangerous if mishandled. Many divers start with a pole spear on the reef and add a speargun only when they are ready to target bigger fish in open water.
| Tool | Best For | Pros | Cons |
|---|---|---|---|
| Three-prong pole spear | Reef fish in holes and close range | Cheap, simple, fast reload, forgiving | Short range, less power |
| Hawaiian sling | Close to mid range shots | Traditional feel, compact | Less common, separate shaft to manage |
| Band-powered speargun | Larger or more wary fish | More range and power | Heavier, slower reload, more risk |
Online retailers such as Amazon carry a wide selection of pole spears, tips and replacement slings, which can be handy if you want to compare styles or need a spare before a trip. Local dive shops are still worth visiting, because staff can recommend the right length and tip for the reefs you plan to dive.
Mask, Snorkel, Fins and Exposure Protection
A low-volume mask makes equalizing easier and gives a wider field of view. A simple snorkel without purge valves or splash guards is better for diving because it clears quickly and creates less drag. Long-blade freediving fins move more water with less effort, although shorter fins are easier to manage on shallow reef and when climbing in and out over rocks.
Water temperatures in Hawaii are warm compared with many places, but you can still get chilled during long sessions. A thin wetsuit, from a rash guard up to a few millimeters thick depending on your tolerance, helps with warmth, sun protection and scrapes from coral and lava. Many divers prefer camouflage patterns or neutral colors to blend into the reef.
Weight Belt, Float and Accessories
A properly adjusted weight belt is critical for both comfort and safety. You want to be close to neutral at a depth a few feet below your typical working depth, so you can rest on the surface without fighting to stay up and still descend easily. Quick-release buckles are a must.
A dive float with a flag tells boats where you are, gives you something to rest on, and can hold your catch away from your body. A stringer or catch bag lets you secure fish, but in waters with sharks, keeping your catch on a float line rather than on your waist is a common safety practice. A dive knife, gloves suited to local rules and common practice, and tabi or reef booties round out the kit.
Many divers order accessories like floats, stringers and spare slings from Amazon or similar retailers, and then fine-tune their kit with local gear once they know what works. Whatever you buy, rinse it with fresh water after every dive to keep salt from destroying moving parts.
Breath-Hold Skills and Dive Safety
Every technique in this guide depends on one foundation: safe, relaxed breath-hold diving. Shallow water blackout kills experienced spearfishers every year around the world, and Hawaii is no exception. Your skill at shooting fish is irrelevant if you are not safe in the water.
Breathe Up and Relax
Before each dive, rest on the surface and breathe slowly and calmly. Many divers relax their whole body, let their face float in the water, and breathe through the snorkel with long, slow exhales. The goal is to lower your heart rate and settle your mind, not to pack your lungs with air through fast, deep breathing.
Avoid hyperventilation. Rapid, forced breathing before a dive lowers carbon dioxide in your blood, which suppresses your urge to breathe without increasing oxygen much. That creates a dangerous mismatch: you feel fine until oxygen drops too low, and then you can lose consciousness without warning.
Equalizing and Descending
As you descend, pressure increases on your ears and sinuses. Equalize early and often, starting at the surface and continuing every few feet, using whichever method works for you. Never force it. If you cannot equalize, ascend slightly and try again or abort the dive.
A smooth duck dive, with your body bending at the waist and legs lifting straight up, lets you slip under with minimal splashing and effort. Kick gently and steadily on the way down, and stop kicking as you approach the bottom so you glide in quietly.
The Buddy System and Shallow Water Blackout
The single most important safety practice in spearfishing is diving with a buddy who watches you. The classic method is “one up, one down”: one diver is always on the surface watching while the other dives. The watcher should follow the diver’s ascent and stay close for at least the first several seconds after they surface, because blackouts often occur near or just at the surface.
- Agree on hand signals and what you will do if one of you blacks out.
- Always dive one at a time; one diver stays on the surface and watches.
- The watcher keeps eyes on the diver from the start of the descent until well after they recover on the surface.
- After surfacing, the diver performs recovery breathing and gives an OK sign before the watcher looks away.
- Rest at least as long as your dive time, and longer for deeper or harder dives.
- If anything feels wrong, stop diving for the day.
Taking a freediving safety course is one of the best investments you can make. Even a short course teaches rescue techniques, recovery breathing and how to recognize warning signs in yourself and your buddy.
Surge, Currents and Exits
Surge on Hawaiian reefs can be powerful. Learn to time your movements with the rhythm of the swell: descend and approach on the backwash, hold onto rocks or let yourself be carried gently, and avoid being pushed into coral or lava. Never enter holes or arches where surge could pin you.
Plan your entry and exit before you get in. Rocky shorelines can be easy to enter and hard to leave once the surf picks up. Watch sets for several minutes, pick an exit point, and leave the water early if conditions are building. If you get caught in a current, swim across it rather than against it.
Core Reef Hunting Techniques
Once you are comfortable and safe in the water, technique becomes about approach, positioning and shot placement. The best divers make it look effortless because they spend more time watching and less time chasing.
The Aspetto or Ambush Technique
The aspetto, or ambush, method involves diving to the bottom, settling quietly behind cover, and waiting for fish to come to you. It works beautifully on Hawaiian reefs where curious or territorial fish will often swim in to investigate a still diver.
- Pick a spot near structure such as a ledge, boulder or reef edge where fish are moving.
- Descend smoothly and settle on the bottom with minimal fin kicks.
- Hide your body partially behind a rock or coral head, with your spear pointing in the direction fish are likely to come.
- Stay still, keep your breathing calm, and avoid direct eye contact with approaching fish.
- Wait until the fish turns broadside or comes within your effective range before taking the shot.
- Ascend smoothly when you start to feel the urge to breathe, rather than waiting until the last moment.
Patience is everything. Many fish will circle at the edge of your range before committing. Trying to chase them usually ends with them disappearing.
The Hole Hunting or Agguato Technique
Hole hunting, sometimes called the agguato method, is a staple of Hawaii reef diving. Many reef fish, as well as tako, hide in holes, cracks and under ledges, especially when divers are around. Instead of waiting in open water, you slowly cruise along the reef, peeking into holes and around corners.
Approach each hole quietly from the side, not directly from above. Move slowly as you look in, giving your eyes time to adjust to the darker interior. When you see a fish, take a moment to judge whether it is legal and whether you have a clean shot. Do not shoot blindly into a hole, and never reach into a crevice where you cannot see; eels and spiny urchins live there too.
This technique works especially well with a short pole spear, which is easy to maneuver near rock and coral.
Stalking Along the Reef
Stalking means moving slowly along the reef, staying low and using structure to break up your outline as you approach fish. It is effective for species that feed actively along the bottom or around coral heads, such as kala, uhu and goatfish.
Use the surge to your advantage: let it carry you a few feet forward when it moves in your direction, then pause when it pulls back. Keep your fins quiet, avoid kicking up sand, and approach fish at an angle rather than head on. When you get close enough, wait for the fish to turn so you have a clean side shot.
Shot Placement and Ethical Kills
A clean, ethical shot is one that kills the fish quickly or immobilizes it so you can dispatch it fast. For most reef fish, aim just behind the gill plate, along the lateral line, or slightly above it toward the spine. A shot in this area tends to hit vital organs and the spine, and it holds well on a three-prong tip.
Avoid shooting at long range or at fish that are moving fast and head-on. Poor shots lead to wounded fish that escape and die later, which is wasteful and harmful to the reef. Dispatch your catch quickly with a knife or spike, and remove it from the water or secure it on your float to reduce the chance of attracting sharks.
Targeting Common Hawaii Reef Species
Each species on Hawaii’s reefs has its own habits and rules. Learning a few of them in depth will make you a better diver than knowing a little about everything. Our Reef Fish Species Identification Guide for Hawaii is a good primer before you get in the water.
Uhu (Parrotfish)
Uhu are among the most sought-after reef fish in Hawaii, and also among the most important for reef health. They graze algae from coral and dead reef, and their grinding produces much of the white sand on Hawaiian beaches. Because of that ecological role, uhu are subject to specific rules, and some species and the larger males are protected more strictly.
Uhu are often wary of divers and tend to keep a steady distance. They feed by moving along the reef, pausing to bite at algae. Stalking with careful use of cover works well, as does waiting near a feeding route. If you target uhu, learn to identify the species and the color phases, and make sure every fish you take meets the current regulations.
Kala, Manini and Other Surgeonfish
Kala (unicornfish) and manini (convict tang) are common surgeonfish targets. Kala often cruise in groups along the reef edge and can be curious about divers. Manini graze in schools on shallow reef and are a classic shore-diving target.
Both have sharp scalpel-like spines near the tail, which can cut your hands when you handle them. Take care when removing them from the spear and stringing them. Size limits apply to some surgeonfish, so check the current table and only take fish that clearly meet them.
Goatfish, Menpachi and Night Diving Species
Kumu and weke, the goatfish, root through sand around the reef with their chin barbels. They are prized eating fish, and kumu in particular is highly valued. They are often found in pairs or small groups, moving between coral heads and sand patches. Approach them slowly along the bottom and wait for them to settle into feeding before taking a shot.
Menpachi (squirrelfish) and aweoweo (bigeye) hide in holes and caves during the day and come out at night. Night diving opens a different world on Hawaii’s reefs, but it also increases risk. If you are interested, start with an experienced local buddy and familiar shallow sites.
Tako, Lobster and What You Cannot Spear
Tako (octopus) are a favorite target for Hawaii divers. Spotting them takes practice: look for piles of shells and crab remains outside holes, and for subtle color changes on the reef. Tako have a minimum weight, and our Hawaii octopus (tako) harvest regulations page explains the rules.
Spiny lobster, on the other hand, may not be speared. They also have a closed season and a minimum size. If you want lobster, learn the legal methods and seasons first. When it comes to protected species such as turtles, monk seals and certain reef fish, the rule is simple: look, do not touch, and give them room.
Taape, Roi and Ciguatera
Taape (bluestripe snapper) and roi (peacock grouper) were introduced to Hawaii decades ago and are now widespread. Many divers target them as a way to reduce their impact on native species, and our Are Taape and Roi Bad for Hawaii’s Reefs? article covers that debate.
Roi in particular carry a risk of ciguatera, a type of food poisoning caused by toxins that build up in some reef fish. The toxin is not destroyed by cooking. Many local divers spear roi to remove them but do not eat them. If you plan to eat reef fish, learn Which Hawaii species carry a ciguatera risk and follow local advice.
Reading Conditions and Choosing Dive Sites
A great technique cannot save a dive in the wrong place or the wrong conditions. Learning to choose sites is one of the biggest skill jumps a spearfisher can make.
Swell, Wind and Visibility
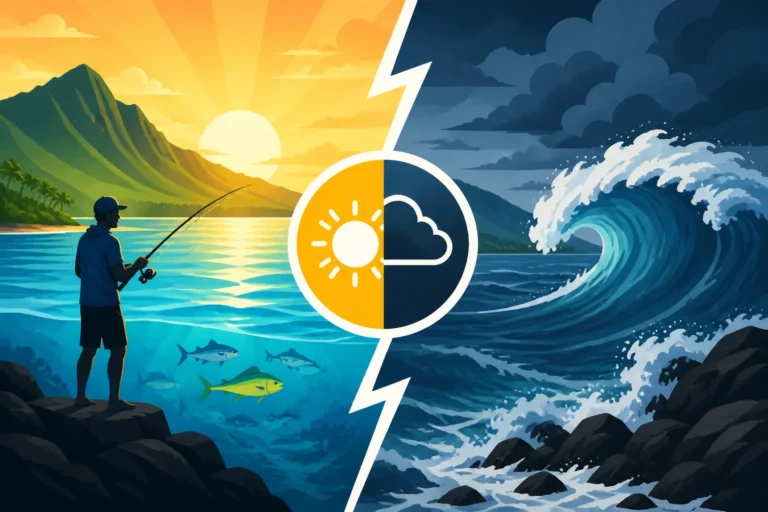
As a rough rule, north and west shores get big winter surf, south shores get more summer swell, and east shores feel the trade winds most of the year. Choose sides of the island based on the season and the forecast. Calm, clear water makes for safer dives and better visibility, but it also makes fish more wary. Slightly stirred water can give you cover, as long as it is still safe.
| Shore | Common Hazard | Often Best Season | Notes |
|---|---|---|---|
| North shores | Large winter surf | Summer | Spectacular in calm months |
| South shores | Summer south swells | Winter and spring | Often calm in winter |
| East shores | Trade wind chop | Light wind days | Plan around the wind |
| West shores | Some winter swell, often calm | Much of the year | Leeward sides can be very clear |
Rain also matters. Heavy rain can send muddy runoff into the ocean near stream mouths, lowering visibility and raising bacteria levels. Many divers wait a day or two after big storms.
Shore Diving Versus Boat Diving
Shore diving is the classic Hawaii approach. You can explore reefs near beach parks and lava points with nothing more than your gear and a car. It is cheap and flexible, but entries and exits can be tricky, and you are limited to reefs near shore.
Boat diving opens up offshore reefs, deeper ledges and more remote coastlines. It also brings new risks, including boat traffic and currents that can carry you away from the boat. Dive with an experienced captain, use a float and flag, and agree on pickup procedures. For ideas on where shore access works well, see Best fishing spots open to shore-based spearfishing.
Reading the Reef From the Surface
Before diving a new reef, spend a few minutes swimming on the surface and studying the bottom. Look for edges where reef meets sand, channels where water flows, ledges and overhangs, and areas with active fish. Note where surge is strongest and where it is calmer.
Watch fish behavior. If fish are scattering as soon as you approach, the area is probably heavily dived, and you may need to slow down or try a different spot. If fish are calm and feeding, take your time and set up carefully.
A Sample Reef Dive Day From Start to Finish
Techniques make more sense when you see how they fit together. Here is how a typical half-day shore dive might unfold for a pair of intermediate divers on a calm leeward reef.
Before You Get Wet
The night before, both divers check the swell, wind and tide forecasts and pick a primary site plus a backup on a different shore. They look up whether either site sits inside a protected area, confirm the current size limits for the species they hope to see, and pack the car: pole spears, masks, snorkels, fins, wetsuits, weight belts, float with flag, float line, knife, cooler with ice, fresh water for rinsing, and a basic first aid kit. A spare sling and a spare tip go in the bag too, because a snapped sling ends a dive day fast. Some divers keep a small kit of spares ordered from Amazon or a local shop in the car for exactly this reason.
At the site, they spend ten minutes watching the water. They count the sets, note where the waves break, and agree on an entry point, an exit point and a backup exit in case the first one gets rough. They also agree on a turnaround time and a signal for calling the dive early.
In the Water
The first twenty minutes are about warming up. Each diver makes easy, shallow dives without shooting, just equalizing, relaxing and looking at the reef. Bottom times start short and stretch naturally as the body adapts. The buddy on the surface watches every dive.
Once comfortable, they start hunting in turns. One diver works the reef edge with short aspetto drops while the other watches; then they swap. When a legal kala settles near a ledge, the diver waits for it to turn broadside, takes a clean shot behind the gill plate, dispatches it, and clips it to the float line rather than the waist. Every few dives they check the float position, the swell and each other’s energy.
Getting Out and Wrapping Up
When the agreed time comes, or when either diver feels tired or cold, they head for the exit, timing their climb out with the lulls between sets. On shore they put fish on ice immediately, rinse gear, and write a few notes: site, tide, visibility, surge, species seen, what worked. That log becomes one of the most useful tools they own.
| Phase | Key Actions | Common Mistake to Avoid |
|---|---|---|
| Planning | Forecast, rules check, backup site | Diving a protected area by accident |
| Entry | Watch sets, plan exits | Rushing in during a set |
| Warm-up | Easy dives, no shooting | Going deep on the first dive |
| Hunting | One up one down, patient shots | Chasing fish and over-breathing |
| Exit | Time the lull, leave early if building | Waiting until exhausted |
| After | Ice catch, rinse gear, log notes | Leaving fish in the sun |
Gear Care Between Dives
Salt, sun and sand are hard on spearfishing gear. Rinse everything in fresh water after each dive, paying special attention to sling rubber, spear tips and fin pockets. Dry rubber out of direct sunlight, because UV breaks it down quickly. Inspect slings for nicks and cracks before each trip and replace them early; a sling that snaps mid-load can injure your hand or face. Sharpen or replace dull tips, and check the threads where tips screw onto the shaft. Replacement parts are widely available through local dive shops and online retailers like Amazon, so there is no reason to dive with worn gear.
Etiquette, Conservation and Long-Term Skill Building
The reefs you dive today are the same reefs that local families have depended on for generations. Treating them well is part of being a good spearfisher in Hawaii.
Respecting Local Divers and Spots
If you see local divers working a reef, do not jump in right next to them. Give them space, or move to a different area. Ask about local etiquette if you are unsure; many divers appreciate visitors who show respect and humility.
Avoid shooting more fish than you need, and never waste a fish. Take only what you will eat or share fresh. If you are diving with friends, coordinate so the group’s catch stays reasonable.
Selective Harvest
Selective harvest means choosing which fish to take with the reef’s health in mind. Many experienced divers avoid taking the largest breeding individuals of some species, especially those that play important ecological roles like uhu. Others focus on invasive or abundant species to reduce pressure on sensitive ones.
You do not have to be perfect to make a difference. Simply pausing before every shot to ask whether the fish is legal, whether you need it, and whether there is a better choice will make you a more responsible diver.
Training, Practice and Progression
Spearfishing skill grows over years, not weeks. Start shallow and simple, focusing on comfort, safety and observation. Spend time freediving without a spear to learn fish behavior and improve breath-hold. Take a freediving course, practice with a regular buddy, and build your depth and bottom time gradually.
Keep a dive log with notes on sites, conditions, tides, species seen, and what worked. Over time, those notes will show patterns that help you predict where and when to dive. For complementary reef skills from the hook-and-line side, our Best Techniques for Calm Water Reef Fishing article offers useful insight into how reef fish behave through the day.
When you combine a quiet approach, sound breath-hold habits and real respect for the reef and the people who depend on it, you stop surfacing empty-handed and start coming home with a few good fish and the confidence that you took them the right way.
Disclaimer
This article is for general informational purposes only and does not constitute professional advice. Laws, prices and regulations vary by location and change over time. Consult a qualified professional for guidance on your specific situation.