Best sonar settings for finding structure off Kona
Navigating the deep, intricate waters off the Kona Coast to find that perfect, fish-holding structure can feel like searching for a needle in a haystack. The volcanic seafloor here is a maze of ledges, pinnacles, and canyons, and without a properly dialed-in sonar, you might be driving right over trophy fish without even knowing it. This guide will help you fine-tune your sonar settings specifically for the challenging, yet incredibly rewarding, fishing grounds of Kona, ensuring you pinpoint those elusive underwater hotspots where the big ones lurk.
Understanding Your Sonar System for Kona Waters
Before we dive into specific settings, it’s crucial to understand the fundamental types of sonar and how your transducer works. The deep, often turbulent waters of Kona present unique challenges that necessitate a good grasp of your equipment’s capabilities. Without this foundation, even the best settings won't yield optimal results.
Chirp vs. Traditional Sonar in Deep Water
For serious anglers targeting the deep structure off Kona, the debate between CHIRP and traditional sonar isn't much of a debate at all – CHIRP almost always comes out on top. Traditional sonar emits a single frequency ping, which works fine in shallower waters but can struggle with target separation and clarity as depth increases. Imagine shouting one note into a canyon; the echo comes back, but it's hard to distinguish individual details.
CHIRP (Compressed High-Intensity Radiated Pulse) sonar, on the other hand, sweeps a continuous range of frequencies, sending out a longer, more detailed pulse. This allows for much clearer, higher-resolution images of the bottom and the fish swimming near it, even in depths reaching hundreds or thousands of feet. For example, when you're scouting for productive bottomfishing spots in Hawaii where opakapaka or onaga might be hiding, CHIRP can help you differentiate between a small school of baitfish, individual larger fish, and the actual rock structure they're holding to. The enhanced target separation means you're not just seeing a blob on the screen; you're seeing distinct returns that give you confidence in what you're marking. This is especially important in Kona's complex environment, where the difference between a barren lava rock and a live coral head teeming with fish can be subtle but significant.
Transducer Placement and Cone Angle
Your sonar unit is only as good as the information it receives from the transducer, which is essentially the eyes and ears of your system underwater. Proper transducer placement is absolutely paramount, particularly on a boat that will be running offshore in potentially choppy conditions. A transducer that's not clean, level, or free from cavitation (air bubbles) will produce a noisy, unreliable image, regardless of how perfectly you set your display options. For Kona, where you might be running at speed to offshore fishing grounds before slowing down to prospect, a thru-hull transducer is often preferred for its reliability and lack of interference, though a transom-mount can work if carefully installed.
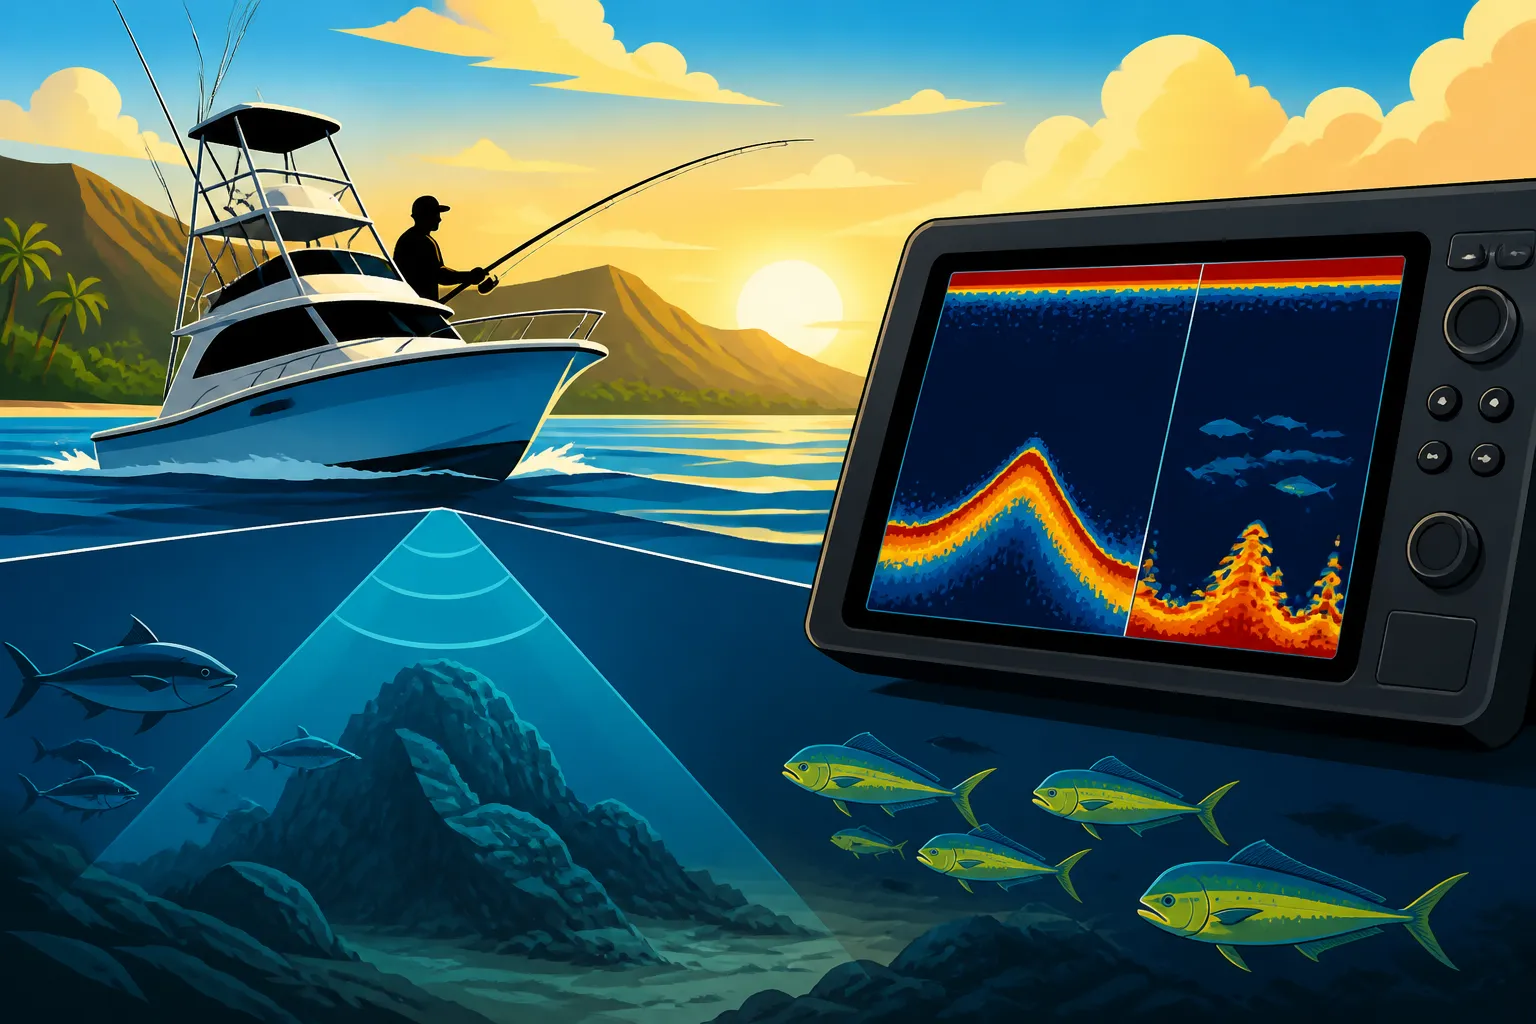
Beyond placement, understanding your transducer's cone angle is vital. This refers to the width of the sonar beam it sends out. A wider cone angle covers a larger area but offers less detail, while a narrower cone angle provides more detail but covers a smaller footprint. In Kona's deep waters, a transducer with a narrower cone angle (or the ability to adjust it via CHIRP technology) can be beneficial for precisely locating deep structure. However, a wider cone can be great for initial scouting runs to cover more ground. Many modern CHIRP transducers offer multiple cone angles or adjustable frequencies that effectively change the cone, allowing you to switch from a broad search pattern to a pinpoint focus. If you’re looking to find those deep water dropoffs to fish off Kona, understanding how your cone angle interacts with the steep topography is crucial.
Key Sonar Settings for Structure Identification
Once your transducer is correctly installed and you understand its basic function, it's time to dive into the specific settings that will help you cut through the water column and reveal the secrets of Kona's underwater landscape. These adjustments will empower you to interpret what your screen is showing you, turning abstract lines into actionable intelligence.
Frequency Selection for Deep Structure
When you're trying to peer into the abyssal depths off the Kona Coast, selecting the right frequency is everything. Lower frequencies (like 50 kHz or the lower end of a CHIRP spectrum, such as 28-60 kHz) are your best friends for deep water. They penetrate further into the water column and are less susceptible to attenuation (signal loss) than higher frequencies. This means they're excellent for marking the bottom contour, identifying large structures, and even picking up the thermocline – that invisible layer where water temperature changes dramatically, often holding baitfish and predatory species like ahi. If you are specifically targeting How to Catch Ahi in Hawaii, understanding the thermocline is often key.
Higher frequencies (like 200 kHz or 150-240 kHz CHIRP) offer finer detail and better target separation but lose their effectiveness quickly in deep water. Think of it like this: a low frequency is a wide, powerful spotlight illuminating a vast cave, while a high frequency is a precise laser pointer highlighting individual specks on the wall. For deep structure fishing in Kona, many experienced anglers run a low CHIRP frequency to maintain bottom contact and identify major structure, sometimes simultaneously with a medium or high frequency for enhanced detail on fish returns in the upper water column or just above the structure. Experimenting with your unit’s different frequency ranges will be key to understanding what works best for your specific fishing style and target species.
Gain, Sensitivity, and Noise Rejection
These three settings are often misunderstood but are absolutely critical for getting a clear picture of what's beneath your boat. They work hand-in-hand to control how much information your sonar receives and how it filters out unwanted clutter.
- Gain (or Sensitivity): This determines how sensitive your transducer is to echoes. Too low, and you'll miss faint returns from fish or soft bottom structure. Too high, and your screen will be filled with "noise" – interference from air bubbles, plankton, or even other boats' sonar. The trick in Kona's deep, often nutrient-rich waters is to run your gain as high as possible without creating excessive clutter. You want to see the faint returns from individual fish near the bottom, but not so much noise that you can't distinguish them from the background. Start by setting your gain to "Auto" and then manually increase it in small increments. You'll often find that the optimal gain setting changes throughout the day depending on currents, boat speed, and even the amount of marine life in the water column. When you're trying to pinpoint bottomfish species of Hawaii, this manual adjustment becomes invaluable.
- Noise Rejection (or Interference Rejection): This setting helps filter out unwanted electrical noise from your boat's engine, trolling motor, or other electronics, as well as interference from other sonar units. In busy areas or when running multiple electronics, noise can obscure valuable targets. Adjusting this setting can clean up your screen significantly, but be careful not to set it too high, as it can also filter out legitimate, faint fish returns. Many modern units from brands like Garmin, Lowrance, and Humminbird have sophisticated noise rejection algorithms that do a great job automatically, but manual fine-tuning can sometimes yield even better results. If you're encountering a lot of "fuzz" on your screen, adjusting this is often the first step.
Range and Scroll Speed Optimization
Think of your sonar screen as a real-time painting of the underwater world. How that painting appears depends greatly on how you frame it (range) and how quickly it's being drawn (scroll speed).
- Range (Depth): This setting determines the depth range displayed on your screen. In Kona, where depths can drop dramatically from a few hundred feet to thousands in short order, you'll constantly be adjusting your range. If you're prospecting for deep bottomfish at, say, 800 feet, set your range to perhaps 0-1000 feet. This keeps the bottom in view and allows you to see any fish holding above it. If you set it too shallow, you'll lose bottom contact; too deep, and the details will be compressed, making it harder to discern individual fish or subtle structure changes. When you're making a run to locate potential Best Deep Sea Fishing Spots in Hawaii, having your range set appropriately ensures you're always seeing what's relevant. Many units allow you to lock the bottom, meaning the bottom line stays fixed, and you can adjust the upper range to focus on activity just above it.
- Scroll Speed: This controls how quickly the sonar history moves across your screen. A faster scroll speed provides more detailed, real-time information, but it also means less history is visible. A slower scroll speed compresses the image, making it harder to distinguish individual fish but allowing you to see trends over a longer period. For structure fishing, a medium-to-fast scroll speed is generally preferred. This allows you to clearly see the shape of the structure as you pass over it and detect individual fish marks. When you're slowly drifting over a promising ledge, a faster scroll speed can give you a clearer, less "smeared" image of individual fish holding tight to the bottom. If you want to identify Best jig weight for bottomfishing in deep water, a clear view of your jig falling and interacting with the bottom can be greatly aided by optimal scroll speed.
Advanced Techniques for Pinpointing Productive Structure
Having your basic sonar settings dialed in is a great start, but to truly master finding structure off Kona, you need to employ some advanced interpretation skills and leverage supplementary technologies. This is where you move from merely seeing blobs on a screen to actively reading the underwater landscape.
Interpreting Sonar Returns: Distinguishing Fish from Structure
This is perhaps the most crucial skill for any serious angler using sonar. Your screen displays echoes, and learning to differentiate between a rock, a coral head, a school of bait, or a trophy ulua takes practice and keen observation.
- Hard vs. Soft Bottom: A hard bottom (like Kona's volcanic rock) will typically show a thick, distinct bottom line, often with a "double echo" – a faint second line below the main bottom return, caused by the sonar signal bouncing off the hard bottom, reflecting back to the transducer, then bouncing off the surface and returning to the transducer a second time. A soft bottom (sand, mud) will show a thinner, less defined bottom line, usually without a double echo. Identifying hard bottom is often the first step in locating desirable structure where fish congregate.
- Structure: Ledges, pinnacles, and humps will appear as distinct changes in the bottom contour. Look for sharp angles, sudden rises, or jagged lines. Coral reefs will often show a "fuzzy" or "textured" return above the hard bottom line. Fish will often appear as arches or distinct marks just above or within this structure. For example, when you're exploring the Kona Coast Fishing Guide, knowing how to spot these nuances can make or break your day.
- Fish Arches: Individual fish, when passed over correctly by the sonar beam, will often create an "arch" shape on your screen. The length and thickness of the arch can give clues to the fish's size and how long it was in the beam. Larger, faster fish often produce longer, thicker arches. Smaller fish or those directly under the boat for a brief moment might show as a dash or a small half-arch.
- Bait Balls: Schools of baitfish will appear as dense clouds or blobs on the screen, often suspended in the water column or tightly packed near structure. These are goldmines, as larger predatory fish are almost always nearby. When searching for Best Time of Day to Catch Ulua, bait presence is often a huge factor.
Side Imaging and Down Imaging for Enhanced Detail
While traditional 2D sonar is excellent for depth and basic fish arches, modern side imaging and down imaging technologies take structure identification to a whole new level, especially in Kona's highly varied terrain.
- Down Imaging (or DownVu/StructureScan): This technology provides a picture-like view directly beneath your boat, showing unprecedented detail of bottom structure and how fish relate to it. It uses high-frequency, thin-beam sonar to essentially "slice" through the water column, creating photographic-quality images. You can clearly see individual rocks, submerged trees (though less common in Kona's deep, barren areas), and even the exact shape of a coral head. This is invaluable for confirming what your 2D sonar is marking as "structure" and seeing how fish are orienting themselves within it.
- Side Imaging (or SideVu/StructureScan): This is arguably the most revolutionary advancement for structure fishing. Instead of looking straight down, side imaging beams scan out to the sides of your boat, covering a much wider area (sometimes hundreds of feet on each side). This allows you to effectively "mow the lawn," mapping vast expanses of the seafloor without having to drive directly over every piece of structure. You can spot ledges, wrecks, and even individual fish well off to the side of your boat. For the extensive, rugged bottom of Kona, side imaging can drastically reduce your search time and help you find previously undiscovered hot spots. Imagine scouting for new Best Bottomfishing Charters in Hawaii might use this technology to find unique spots no one else knows about.
Many high-end sonar units available from retailers like Amazon often combine traditional 2D, down imaging, and side imaging into one display, giving you a comprehensive view of the underwater world. Learning to use these technologies in conjunction with your 2D sonar will make you exponentially more effective at finding fish-holding structure.
Using Waypoints and Chartplotter Integration
Finding promising structure is only half the battle; the other half is being able to return to it reliably. This is where your chartplotter and the strategic use of waypoints become indispensable.
- Marking Waypoints: As soon as you identify a promising piece of structure, a distinct fish mark, or a school of bait, immediately mark a waypoint on your GPS. Don't wait until you've passed it, as currents and boat drift can quickly make it impossible to return to the exact spot. Give your waypoints descriptive names, like "Ledge 400ft," "Pinnacle w/ Ahi," or "Bait Ball 200ft." Over time, you'll build a valuable library of productive spots. When you return, you can use your chartplotter to navigate directly back to these marks. This is especially useful for Bottomfishing in Hawaii, where a specific rock or small rise can hold dozens of fish.
- Chartplotter Integration: Modern sonar units are almost always integrated with a chartplotter, allowing you to see your boat's position relative to contours, waypoints, and even real-time sonar data overlaid on a map. Use this to track your drifts over structure. For instance, if you mark fish on a specific side of a ledge, you can use your chartplotter to adjust your drift on subsequent passes to hit that sweet spot again. Many units allow you to save your sonar recordings, so you can review them later on your computer or even on your unit, drawing new waypoints for areas you might have missed in the heat of the moment. Investing in a quality unit that offers robust chartplotting features, which can often be found on platforms like Amazon, is a game-changer for serious structure fishing. It allows you to build a detailed map of your own fishing grounds, making every trip more efficient and productive.
Recommended Starting Sonar Settings for Deep Structure off Kona
Remember these are starting points; always adjust based on conditions and what you're seeing.
| Setting | Recommendation for Deep Structure (Kona) | Notes |
|---|---|---|
| Sonar Type | CHIRP (Low Frequency) | Essential for deep penetration and target separation. Combine with medium/high CHIRP for enhanced detail if available. |
| Frequency | Low CHIRP (e.g., 28-60 kHz) or 50 kHz | Best for deep water (300ft+). Penetrates further, good for bottom contours and thermocline. |
| Gain/Sensitivity | Start on "Auto," then manually increase until noise appears, then back off slightly. | Aim for maximum sensitivity without excessive clutter. Will vary with depth, speed, and water conditions. |
| Noise Rejection | Start on "Low" or "Medium" | Increase if experiencing excessive interference. Be cautious not to filter out faint fish returns. |
| Scroll Speed | Medium to Fast | Provides clearer, less "smeared" images of structure and fish when drifting or moving slowly. Adjust slower for observing trends over time. |
| Depth Range | Set slightly deeper than your target depth (e.g., 0-1000ft for 800ft fishing). | Keeps bottom in view and allows for observation of fish holding above structure. Use "Bottom Lock" or "Auto Range" then manual adjustment. |
| Color Palette | High Contrast (e.g., traditional blue/red, or specific "fishing" palettes) | Makes it easier to differentiate between bottom, fish, and water column noise. Experiment to find what works best for your eyes. |
| Bottom Fill | Off or Low | Avoids obscuring subtle bottom detail. You want to see the texture of the bottom, not just a solid color block. |
| A-Scope/Real-Time | On | Shows real-time echoes from the water directly under your boat, useful for identifying fish as they pass through the beam. |
| Side/Down Imaging | Use as much as possible! | Invaluable for mapping wide areas (Side Imaging) and getting photographic detail directly below (Down Imaging). Run alongside 2D sonar for a comprehensive view, especially when trying to How to locate bottomfish structure with sonar. |
Remember, sonar is a tool that requires practice and patience. The more you use it and experiment with the settings in the varied and deep waters off Kona, the better you'll become at interpreting its secrets. Don't be afraid to tweak settings constantly throughout your fishing day. Happy hunting for that perfect structure!
Disclaimer
This article is for general informational purposes only and does not constitute professional advice. Laws, prices and regulations vary by location and change over time. Consult a qualified professional for guidance on your specific situation.