How to catch akule at night with lights
There's nothing quite like the thrill of fishing in Hawaii, but sometimes, those daytime hours can feel like a relentless hunt for elusive fish. If you've ever felt frustrated trying to locate akule (bigeye scad) during the bright Hawaiian sun, you're not alone. Many anglers find that these schooling fish become much more accessible after dark, especially when you know the secret: using lights. This comprehensive guide will walk you through everything you need to know about how to catch akule at night with lights, from understanding their nocturnal habits to setting up your gear and mastering the techniques for a successful night out on the water.
Understanding Akule Behavior and Nighttime Draw
Akule are fascinating fish, known for their large eyes and tendency to form dense schools. During the day, they often stay in deeper waters or disperse, making them harder to target. But as the sun sets, a whole new world opens up, and their behavior shifts in a way that keen anglers can exploit.
Why Lights Attract Akule
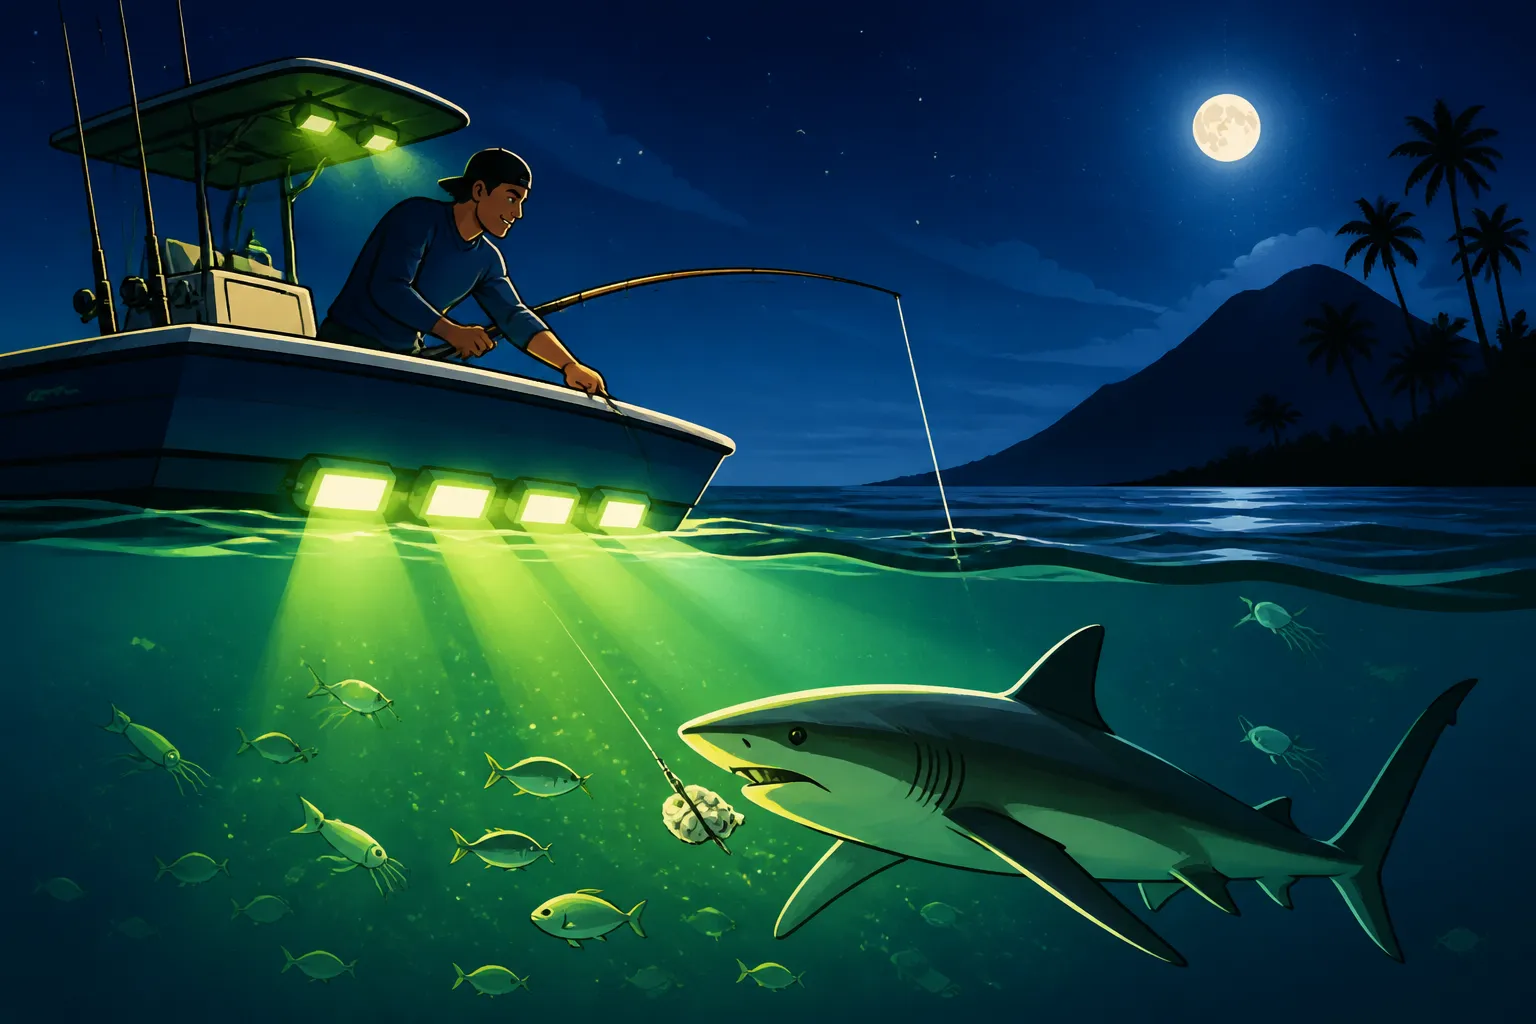
It’s not magic, it’s science! Akule are planktivores, meaning their primary diet consists of tiny organisms like zooplankton. Many of these plankton are phototactic, which means they are attracted to light. When you deploy a light source into the dark ocean, it creates a concentrated area where these microscopic creatures gather. Think of it like a floating buffet for the akule. As the small plankton flock to the light, smaller baitfish follow to feed on the plankton, and then the akule, being opportunistic predators, move in to feed on both the plankton and the smaller baitfish. It’s a cascading effect that can draw in massive schools right to your light. This natural food chain concentration is key to understanding why using lights is so effective for these fish.
The light also serves as a beacon in the vast darkness, acting like a magnet not just for their food, but for the akule themselves, making them more visible and predictable in their movements. You’ll often see them circling the perimeter of the light, darting in and out, creating a shimmering spectacle that signals their presence. This aggregation makes it much easier for you to target them compared to trying to find dispersed schools in broad daylight.
Prime Conditions for Night Akule Fishing
While lights are a game-changer, not all nights are created equal when it comes to akule fishing. Understanding the prime conditions can significantly increase your chances of a successful outing. Generally, a dark night with minimal moon interference is ideal. A new moon phase, or nights when the moon sets early or rises late, provides the darkest canvas, making your artificial light source the most dominant attraction in the water. If the moon is too bright, its natural illumination can dilute the effectiveness of your artificial lights, spreading the plankton and baitfish out more.
Calm waters are also a huge plus. Choppy seas can make it difficult to maintain a steady light source and also make it harder for the fish to hold school in a concentrated area. Plus, it's just more comfortable and safer for you! Think about those glass-flat evenings when the ocean is like a mirror; those are often perfect for light fishing. Beyond the moon and swell, water clarity plays a role too. Clearer water allows your light to penetrate further and attract fish from a wider area. If the water is murky from recent heavy rains, for example, the light's effectiveness might be diminished. Always check the forecast and ocean conditions before you head out.
Essential Gear for Night Akule Fishing
To really make the most of night akule fishing, you need the right tools. It's more than just a rod and reel; it involves specialized lighting and rigs to effectively attract and catch these schooling fish. Don't worry, most of it isn't overly complicated, but having the right setup can make a world of difference.
Choosing the Right Lights
The cornerstone of night akule fishing is, of course, the light itself. You have a few main options, each with its pros and cons:
- Submersible Lights: These are perhaps the most popular choice. They are specifically designed to be lowered into the water, typically on a long cord, and emit light directly beneath the surface. Many submersible lights come in various colors, with green often being favored for its ability to penetrate water effectively and attract a wide range of marine life. They are usually powered by a 12V battery, making them portable for boat or shore use. When looking for one, consider brightness (lumens), battery life, and durability. You can find a good selection of these on sites like Amazon.
- Floating Lights: These lights sit on the surface of the water and shine downwards. They are often less disruptive to the water column and can illuminate a wider surface area. Some are self-contained and battery-powered, while others require an external power source. They work well, especially in shallower areas or when you want to attract fish from a broader area around your boat or casting spot.
- Overhead Lights (from a boat or pier): While not specifically fishing lights, bright deck lights on a boat or pier lights can also work to some extent. However, their light often disperses more in the air before hitting the water, making them less efficient than lights designed to be in or on the water. They can still draw in fish, particularly if the light is powerful and directed.
Regardless of the type, ensure your light source is bright enough to create a distinct zone of illumination and that you have a reliable power source, whether it's a marine battery, a portable power station, or a sturdy extension cord if you're fishing from a pier with access to outlets. Having a backup light source is always a smart move, just in case your primary one decides to call it quits mid-session.
Rods, Reels, Lines, and Rigs
For akule, you don't typically need heavy-duty gear. They're not giant fish, but they school tightly and can put up a decent fight, especially when you're pulling a string of them.
- Rods: A light to medium-light spinning rod, around 6 to 7 feet in length, is generally perfect. Something sensitive enough to feel the quick bites, but with enough backbone to handle multiple fish. If you're using a sabiki rig (more on that in a moment), a slightly longer rod can help with casting and keeping the multiple hooks separated.
- Reels: A 2500 to 4000 size spinning reel spooled with light line will do the trick. A smooth drag is beneficial, as akule can make quick runs.
- Line: Opt for 6-10 lb monofilament or braided line. Monofilament offers a bit of stretch, which can be forgiving with multiple fish, while braid offers superior sensitivity and casting distance. If using braid, a fluorocarbon leader of similar strength, about 3-5 feet long, is a good idea for invisibility and abrasion resistance.
- Rigs:
- Sabiki Rigs: These are the absolute bread and butter for akule. A sabiki rig consists of multiple small hooks (usually 4-6) tied to dropper lines, often adorned with shiny, fish-skin-like material, small feathers, or colored beads, all on a single main line. You tie a sinker to the bottom of the rig to get it down, and your main line to the top. The idea is to mimic a school of tiny baitfish, and akule will often strike multiple hooks at once. You can find these rigs at most tackle shops or readily available on Amazon.
- Small Jigs/Lures: Tiny metal jigs or soft plastics resembling small baitfish can also be effective, especially if the akule are being picky or if you prefer a single-hook approach. These can be tipped with a tiny piece of bait for added attraction.
Remember to keep your hooks small – typically size 8 to 12 are good for akule – as they have relatively small mouths. Carrying a variety of sabiki rigs with different lure styles and colors can be helpful if the fish are finicky.
| Gear Category | Recommended Item | Why It's Essential |
|---|---|---|
| Lights | Submersible LED lights (green often best) | Attracts plankton, which attracts baitfish, which attracts akule |
| Power Source | 12V marine battery, portable power station | Powers your lights for the entire fishing session |
| Rods | 6-7 ft light-to-medium light spinning rod | Sensitive for bites, strong enough for multiple fish |
| Reels | 2500-4000 series spinning reel | Smooth drag, suitable for light lines |
| Line | 6-10 lb monofilament or braided line (with fluorocarbon leader) | Strength, sensitivity, and stealth |
| Rigs | Sabiki rigs (size #8-#12 hooks) | Designed to catch multiple schooling fish at once |
| Sinker | 1/2 oz to 1 oz egg or pyramid sinker | Gets your sabiki rig down to the fish |
| Bait (Optional) | Small pieces of shrimp, squid, or fish flesh | Can tip sabiki hooks or small jigs for added attraction |
| Net | Long-handled landing net | Crucial for scooping up multiple akule quickly |
| Cooler | Insulated cooler with ice | Keeps your catch fresh |
| Headlamp/Flashlight | Hands-free illumination for rigging, unhooking | Essential for safety and visibility in the dark |
The Best Baits and Lures for Akule at Night
While sabiki rigs are incredibly effective on their own, sometimes the akule need a little extra persuasion.
- Sabiki Rigs (unbaited): As mentioned, these are often enough. The reflective material, small size, and movement of the multiple flies simulate a small school of baitfish, which is often irresistible to akule.
- Tipping Sabiki Rigs: If the bite is slow, try tipping each small hook on your sabiki rig with a tiny piece of bait. Favorites include:
- Shrimp: Small pieces of peeled shrimp are highly effective.
- Squid: Tiny strips of squid are tough and stay on the hook well.
- Fish Flesh: Small slivers of oily fish, like mackerel or even a previous akule catch, can work wonders.
- Small Lures/Jigs (baited or unbaited): Tiny metal jigs (1/8 oz to 1/2 oz) or soft plastic grubs and swimbaits that imitate small baitfish can also catch akule. The action of the jig, combined with the light, can trigger strikes. If using a jig, a tiny piece of bait can be added to the hook.
The key is "small." Akule have small mouths, so using tiny baits and hooks is paramount. Often, the light itself does most of the work, but a little extra scent or visual flash can seal the deal.
Step-by-Step Techniques for Light-Assisted Akule Fishing
Now that you have your gear sorted, let's talk about the actual fishing process. It's a blend of setting up your "fishing station" and then employing the right methods to entice and catch those schooling akule.
Setting Up Your Light Station
The location you choose for your light station is critical. Think about where akule might naturally congregate or pass through. Harbors, piers, protected coves, and areas with access to slightly deeper water often hold akule. If you're on a boat, positioning yourself over a drop-off or near a channel mouth can be very productive.
Once you've picked your spot and anchored your boat or settled your gear on the shore, it's time to deploy your light.
- Lowering the Light: If using a submersible light, gently lower it into the water. The depth will depend on the clarity of the water and how deep the akule are holding. Start by lowering it a few feet below the surface, but be prepared to adjust. Sometimes the fish are right under the surface, other times they prefer to hold a bit deeper. You want to create a distinct column of light that extends down into the water.
- Powering Up: Connect your light to its power source. Give it some time – patience is key here. It can take anywhere from 15 minutes to an hour for the plankton to gather, and for the baitfish and then the akule to move in.
- Observing the Water: As the light does its work, keep an eye on the water. You'll often see tiny specks (plankton) appear, followed by small baitfish darting around. Eventually, you'll start to see the tell-tale flashes and shapes of akule moving into the illuminated zone. They might cruise the edges of the light first before committing to the brighter center. This observation period can also give you clues on where they are holding in the water column.
Remember that light discipline is also important. Try to minimize other bright lights on your boat or around your fishing spot, as this can scatter the fish or make them wary. A headlamp with a red light setting is fantastic for tying knots or unhooking fish without disturbing the primary light attraction.
Mastering the Akule Jigging and Netting Methods
Once the akule are schooling under your light, it's game on! There are two primary methods to catch them.
-
Sabiki Jigging: This is the most common and often the most productive method.
- Deployment: Drop your sabiki rig, with a small sinker on the bottom, into the heart of the light. Let it sink until you see the fish on your sonar or by eye, or until it reaches the desired depth.
- Action: Once it's at depth, gently jig the rod. This isn't aggressive jigging; think small, subtle lifts and drops, or a slight twitching motion. You're trying to make the sabiki flies look like tiny, struggling baitfish.
- The Bite: Akule bites can be very light taps or a sudden thud if multiple fish hit at once. When you feel a bite, don't set the hook aggressively like you would for a larger game fish. Instead, maintain tension and perhaps a steady lift. Often, the struggle of one fish will cause others in the school to instinctively strike the remaining hooks.
- Retrieval: Once you feel fish on, retrieve slowly and steadily. Be careful not to let the line go slack, which can allow fish to shake off.
- Multiple Fish: The beauty of sabikis is catching multiple fish at once. Be ready for this! When you get the rig to the surface, you'll likely have several akule flopping around.
-
Netting (Ho'ohulu): In some areas, once a dense school of akule is concentrated under the light, netting can be extremely effective, particularly with a long-handled landing net. This is often done in conjunction with sabiki fishing, where the sabiki rigs are used to draw the school even tighter.
- Preparation: Have your large landing net ready and accessible.
- Execution: With the school tightly gathered, swiftly and carefully scoop the net through the densest part of the school. This often requires a quick, deliberate motion to trap as many fish as possible.
- Legal Considerations: Always be aware of local regulations regarding net fishing. For example, Hawaii has specific Hawaii Akule net fishing rules that might dictate net size, mesh size, or areas where netting is permitted. It's crucial to check the current Hawaii Fishing Regulations Explained before attempting to net fish.
A combination of jigging and netting can be incredibly productive, allowing you to quickly fill a cooler. Remember to bring a good pair of pliers for unhooking and a cooler with ice to keep your catch fresh.
Safety and Best Practices After Dark
Night fishing, while rewarding, carries unique considerations. Safety should always be your top priority.
- Lighting for Yourself: Beyond your fishing light, always have a reliable headlamp or flashlight. A headlamp allows you to keep your hands free for rigging, baiting, and unhooking. Look for models with a red light option, as red light preserves your night vision and is less likely to spook fish.
- Awareness of Surroundings: Be extra vigilant about your footing, especially if you're on rocky shorelines or unfamiliar docks. The darkness can conceal trip hazards. If on a boat, ensure all deck areas are clear of obstructions.
- Communication: Let someone know where you're going and when you expect to return. Consider carrying a fully charged cell phone or a marine radio if you're offshore.
- Weather Monitoring: Check the weather forecast before you go, and be prepared for changing conditions. Sudden squalls can turn a calm night into a dangerous one very quickly.
- Respecting Marine Life: While akule are a target, other creatures might be drawn to your light, including sharks or rays. Be aware of your surroundings and avoid interacting with protected species like monk seals or sea turtles. Maintain a respectful distance and know the Hawaii turtle and monk seal proximity rules for anglers.
- Regulatory Compliance: Always have your Hawaii Fishing License Guide for 2026 in order and understand the Hawaii Bag and Size Limits by Species for akule and any other species you might incidentally catch. Specific rules can change, so a quick review of the Hawaii DLNR fishing regulations PDF before each season is always a good idea.
By following these best practices, you can ensure a safe and enjoyable night of akule fishing.
Where and When to Find Akule at Night
Knowing the techniques and having the right gear is one thing, but knowing where and when to apply them is what truly makes a successful angler. Akule are creatures of habit, and understanding their preferences will lead you to consistent catches.
Ideal Locations for Night Akule
Akule are schooling fish, and they tend to prefer certain types of environments that offer food and some level of protection. When targeting them with lights at night, consider these locations:
- Harbors and Bays: These are classic spots for a reason. Harbors often have calmer waters, and their man-made structures (docks, piers, seawalls) provide shelter for baitfish and plankton, making them natural congregating points. The ambient light from shore can also add to the attraction, though your dedicated fishing light will be the primary draw. Places like Kewalo Basin on Oahu or Honokohau Harbor on the Big Island are often prime spots. You might find some of the Best Harbor Fishing Spots in Hawaii on our site.
- Piers and Docks: Public piers offer easy access for shore-based anglers. The structure itself attracts marine life, and it's relatively simple to deploy lights from these elevated platforms. Just be mindful of other anglers and boat traffic.
- Protected Coves and Anchorages: On a boat, looking for calm, protected coves away from strong currents can be highly effective. These areas allow the plankton and baitfish to gather without being swept away, creating stable feeding grounds for akule.
- Near FADs (Fish Aggregating Devices): While FADs are often thought of for offshore pelagics, some nearshore FADs or even natural convergences can hold schools of akule, especially deeper down. Approaching these at night with lights can bring the schools up to the surface.
- Areas with Drop-offs: Akule often cruise along drop-offs where shallow water suddenly plunges into deeper areas. Positioning your light at the edge of a drop-off can attract fish from both the shallower and deeper zones.
Remember, the key is finding areas where akule can feed and feel relatively secure, and where your light can effectively draw in the entire food chain.
Reading the Conditions: Tides, Moon, and Weather
Beyond choosing a good physical location, timing your trip with the right natural conditions can be the difference between a few fish and a cooler full.
- Tides: Akule are often more active and feed more vigorously during moving tides – either an incoming or outgoing tide. This water movement brings in fresh nutrients and baitfish, stimulating their feeding instincts. A slack tide (the period of minimal water movement between tides) can sometimes be slower, but it's not a hard rule. Many anglers prefer the period leading up to and just after a high or low tide.
- Moon Phase: As mentioned earlier, a dark night is your best friend for light-assisted akule fishing. The new moon phase offers the darkest nights, making your artificial light the most compelling beacon in the water. Nights with little to no moon, or when the moon is a thin crescent or sets early, will generally yield better results. A full moon, while beautiful, can make fishing with lights less effective as its natural light diffuses the concentration of plankton and baitfish.
- Weather: Calm, clear nights are ideal. Strong winds and choppy seas make it difficult to deploy and manage your lights, disturb the aggregation of fish, and simply make for an uncomfortable and potentially unsafe fishing experience. Overcast nights are often excellent, as cloud cover helps to block out any ambient moonlight, making the waters even darker and your lights more effective. Heavy rain, however, can make for a miserable trip and might push fish deeper or disrupt their feeding patterns.
By combining the right location with favorable tidal, moon, and weather conditions, you'll significantly increase your chances of a successful and memorable night of catching akule. There's a lot of great advice on Best Night Fishing Spots in Hawaii that can further guide your planning. Getting out there and observing how akule react to different conditions in your favorite spots is the best way to become a true night fishing expert.
Disclaimer
This article is for general informational purposes only and does not constitute professional advice. Laws, prices and regulations vary by location and change over time. Consult a qualified professional for guidance on your specific situation.